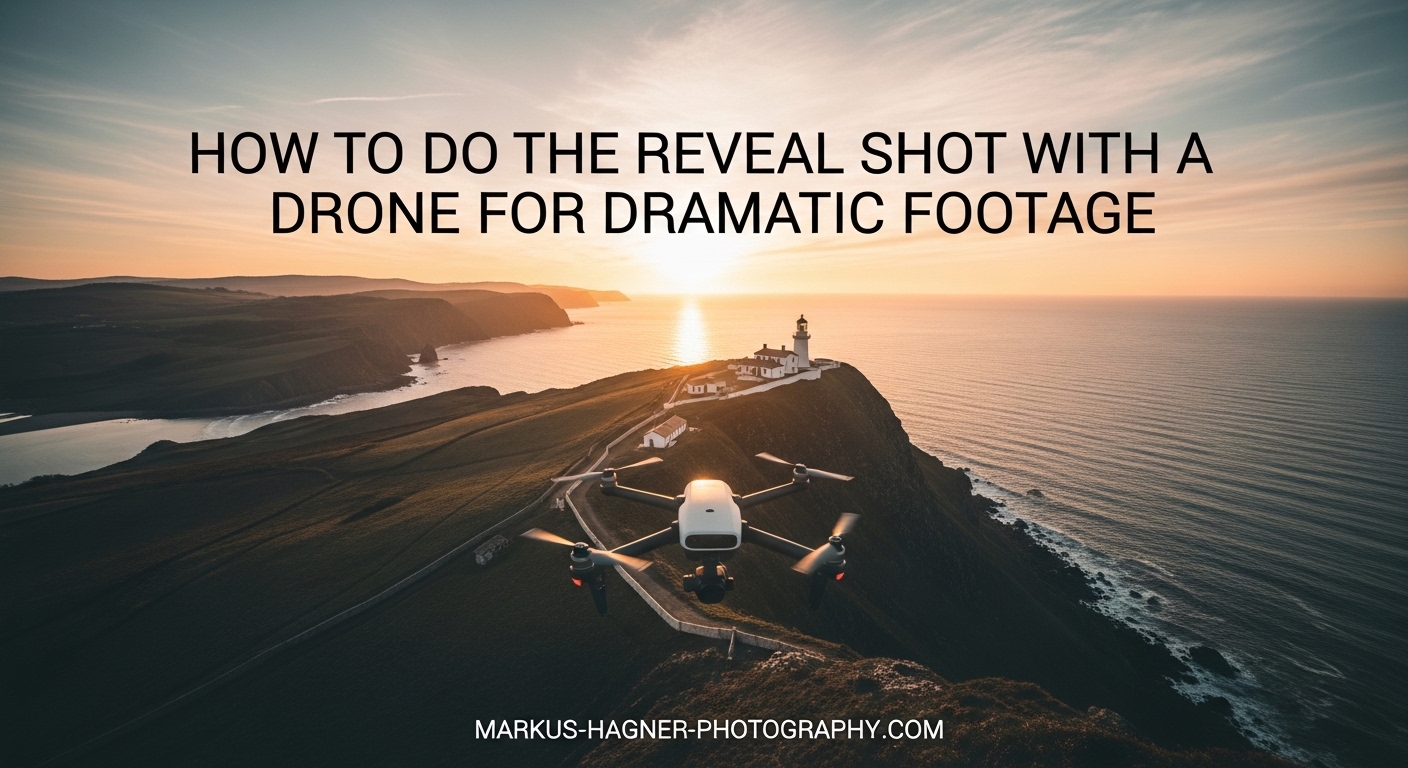
There is nothing quite like the moment a drone camera tilts up to unveil a breathtaking landscape that was hidden from view just seconds before. The reveal shot is one of the most powerful techniques in aerial cinematography, and mastering it transformed my drone footage from amateur clips into cinematic sequences that actually tell a story.
In this guide, I will walk you through everything you need to know about the drone reveal shot. You will learn the exact step-by-step process, multiple variations to add variety to your footage, common mistakes that ruin otherwise great shots, and specific practice exercises to build your skills. Whether you shoot real estate, travel content, or creative films, this technique will elevate your aerial videography.
The reveal shot creates drama through anticipation. Instead of showing your viewer everything at once, you control what they see and when they see it. This storytelling principle is what separates professional drone footage from the endless scroll of random aerial clips on social media.
What Is a Drone Reveal Shot
A drone reveal shot is a cinematic aerial technique where the camera gradually exposes a subject or landscape by moving the drone while simultaneously adjusting the gimbal angle. The magic happens through controlled movement that builds suspense before the full scene comes into view.
Think of it like opening a curtain on a stage. The audience knows something is behind that curtain, and the slow reveal creates anticipation. When the full scene finally appears, it has far more emotional impact than if you had simply shown it from the start.
Why the Reveal Shot Creates Dramatic Impact
The reveal shot works because it engages viewers on a psychological level. Our brains are wired to seek completion. When we see part of a scene, we naturally want to see the rest. By controlling that reveal, you guide the viewer’s attention and create an emotional journey within a single shot.
This technique also adds production value to your footage. A well-executed reveal looks like it belongs in a film or high-end commercial, not a casual social media post. Viewers notice this quality difference, even if they cannot articulate exactly what makes your footage look more professional.
Essential Elements of a Cinematic Reveal
Several key elements separate a mediocre reveal from a cinematic one. First is smoothness. Any jerky movement breaks the spell and reminds viewers they are watching drone footage. Second is timing. The reveal should unfold at a pace that builds anticipation without dragging. Third is composition. What gets revealed and how it enters the frame matters as much as the movement itself.
Lighting plays a crucial role too. The best reveal shots often happen during golden hour when the low sun angle creates depth and warmth. Shadows add dimension to landscapes, and the soft light prevents harsh contrasts that can make aerial footage look flat.
Your camera settings also affect the cinematic quality. A shutter speed around twice your frame rate creates natural motion blur. So if you shoot at 30 frames per second, aim for a shutter speed of 1/60. This gives your footage that film-like quality rather than the hyper-real look of faster shutter speeds.
Pre-Flight Preparation for Reveal Shots
Great reveal shots start before your drone ever leaves the ground. Proper preparation ensures you can focus on flying and composition rather than troubleshooting technical issues mid-flight.
Drone Settings for Cinematic Footage
Set your drone to record in the highest quality format available. If your drone supports it, shoot in LOG or a flat color profile. This gives you more flexibility in post-production to adjust colors and exposure. You might not notice the difference on your phone screen, but it becomes obvious when you color grade your footage.
Disable any digital sharpening or noise reduction in your drone’s camera settings. These in-camera processing effects are often too aggressive for cinematic footage and can create artifacts that are difficult to remove later. Sharpening and noise reduction are better applied selectively during editing.
Camera Settings Checklist
Here are the camera settings I use for reveal shots. Set your ISO as low as possible, typically 100 or the native ISO for your drone’s sensor. Higher ISO introduces noise that becomes especially visible in sky areas and shadows. Use an ND filter if needed to maintain proper exposure at your target shutter speed.
Set your shutter speed to roughly twice your frame rate for natural motion blur. For 24fps footage, use 1/50. For 30fps, use 1/60. For 60fps slow motion, use 1/125. This relationship between frame rate and shutter speed is fundamental to achieving that cinematic look.
Choose your frame rate based on your intended output. If you are creating content primarily for social media, 30fps works well. For a more filmic quality, 24fps is the standard. Shooting at 60fps or higher gives you the option to slow down footage in post, which can smooth out minor movement imperfections.
Environmental Conditions
Check wind speed before flying. Even with excellent gimbal stabilization, strong winds make smooth movements difficult. Most consumer drones handle winds up to 20-25 mph, but reveal shots require precise control. I prefer winds under 10 mph for the smoothest results.
Consider the sun position and how it will affect your shot throughout the reveal. A reveal that starts with the sun in frame will have very different exposure needs than one where the sun is behind the camera. Plan your flight path knowing how the light will change as you move.
Safety and Legal Considerations
Before flying, check local regulations. In the United States, the 120 meter (400 feet) altitude limit applies to most drone operations. This is measured from ground level, not from your takeoff point, so be aware when flying near hills or elevated terrain.
Always maintain visual line of sight with your drone. The temptation to fly further for a more dramatic reveal is strong, but safety must come first. Beyond visual line of sight operations require special waivers and additional training.
Respect privacy when filming. While it is generally legal to film public spaces from the air, filming individuals without consent raises ethical and potentially legal concerns. Consider what or who might be in your frame before you start recording.
How to Do the Reveal Shot with a Drone: Step-by-Step Guide
This step-by-step tutorial will walk you through executing a basic backward reveal shot, which is the foundation for all other reveal variations. Master this technique before moving on to advanced variations.
Step 1: Scout Your Location and Subject
Before launching, identify what you want to reveal and where you want your shot to end. Walk around the area if possible. Understanding the terrain and obstacles from ground level helps you plan a safer, more effective flight path.
Visualize the final frame. What do you want viewers to see when the reveal is complete? This end frame should be your starting point for planning. Work backwards from there to determine where your drone needs to begin the shot.
Step 2: Position Your Drone at the End Point
Fly your drone to where you want the reveal to finish. This is typically the most visually compelling angle of your subject. Frame this shot carefully because it is what viewers will remember.
Take a moment to lock exposure at this position. The lighting here will likely be different from your starting point, and you want consistent exposure throughout the reveal. Most drones allow you to lock exposure with a long press on the screen or a button on the controller.
Step 3: Fly Backward to Your Start Position
Now fly backward to where you want the reveal to begin. This should be a position where your subject is either out of frame or only partially visible. The camera should be pointed straight down or angled away from the subject.
As you fly backward, note any obstacles and get a feel for the distance and direction. This familiarization flight helps you execute the actual shot with confidence. Think of it as a rehearsal.
Step 4: Begin the Reveal Shot
From your start position, begin flying forward slowly and smoothly. At the same time, gradually tilt the gimbal up from its downward or forward-facing position. The key is coordinating these two movements so the subject reveals naturally as you approach.
Move slower than you think you need to. Most beginners fly too fast. A reveal that takes 10-15 seconds will feel more dramatic and cinematic than one completed in 5 seconds. Give your viewers time to anticipate what is coming.
Step 5: Control Your Gimbal Movement
The gimbal tilt is what creates the reveal effect. Start with the camera pointed down or angled away from your subject. As you fly forward, smoothly tilt the gimbal up. The timing of this tilt determines how the reveal unfolds.
Practice tilting the gimbal at different speeds to see what works best for your subject. A slow, gradual tilt creates a gentle reveal. A slightly faster tilt can add energy to the shot. The goal is smooth, consistent movement without any stops or jerks.
Step 6: Fly Through Your End Point
Do not stop exactly when you reach your ideal framing. Continue flying forward for another 3-5 seconds. This extra footage, called handles, gives you editing flexibility. You can always trim the shot later, but you cannot add footage you never captured.
Maintain your gimbal position during these final seconds. The reveal is complete, so the camera should now be level or slightly angled up, capturing your subject in its full glory.
Step 7: Review and Repeat
After completing the shot, review your footage on the drone or your controller screen. Look for smoothness in both the drone movement and gimbal tilt. Check that the exposure remained consistent. Note any issues so you can correct them on your next attempt.
Most reveal shots require multiple takes to perfect. Wind gusts, nervous hands, or timing miscalculations can all affect the result. Be patient with yourself and keep practicing.
Advanced Reveal Shot Variations
Once you master the basic backward reveal, these variations will add diversity to your aerial cinematography toolkit. Each creates a different emotional effect and works best in specific situations.
The Forward Reveal
In a forward reveal, you start close to your subject with the camera pointed down or at an angle that excludes the main scene. As you fly forward and away from the subject, you tilt the gimbal up to reveal the landscape beyond.
This variation works exceptionally well when you have a foreground element like a building, tree, or rock formation to start from. The viewer sees this element first, then the camera pulls back to show the subject in context with its surroundings.
The forward reveal creates a sense of discovery. It feels like the viewer is emerging from somewhere and seeing the world anew. Use this for shots that begin in shadow and emerge into light, or that transition from enclosed spaces to open vistas.
The Backward Reveal
This is the classic reveal shot I described in the step-by-step guide. You start far from your subject, fly backward while tilting the camera up. The subject grows larger in frame as the surrounding landscape is progressively hidden.
The backward reveal works well for establishing shots because it ends on a tight frame of your subject. This focus at the end of the shot naturally leads into whatever scene follows. It is like a visual sentence that ends with the subject as the period.
For maximum impact, time your backward movement so the reveal completes just as the subject fills the frame in the most flattering way. This often means having the subject slightly off-center, following the rule of thirds for composition.
The Tilt Reveal
The tilt reveal minimizes drone movement and focuses on gimbal control. Position your drone above or near your subject with the camera pointed straight down. Then smoothly tilt the gimbal up to reveal the landscape around you.
This technique is excellent when you have limited flying space or when wind makes drone movement difficult. It also creates a unique perspective that feels more like a camera movement than a flight movement.
The tilt reveal emphasizes vertical scale. It works beautifully for revealing waterfalls, tall buildings, or any subject where height is impressive. Starting with the camera pointed down at a river, then tilting up to reveal a waterfall cascading down creates a powerful visual story.
The Rising Reveal
In a rising reveal, you start low with the camera aimed at your subject. As you ascend vertically, the camera gradually reveals the landscape behind and below. This creates a sense of expanding awareness as the world opens up.
This variation requires careful altitude management. You need enough vertical space to complete the reveal safely. It works best in open areas without overhead obstacles or airspace restrictions.
The rising reveal creates feelings of freedom and perspective. It mimics the experience of flying, of rising above the everyday to see the bigger picture. Use this for emotional moments in your films or when you want viewers to feel a sense of awe.
The Side Reveal and Orbit Variation
Side reveals combine lateral movement with gimbal adjustment. Fly horizontally past your subject while tilting the camera to keep the subject in frame. As you pass, the background behind the subject reveals itself, adding depth and context.
This creates a parallax effect where foreground, subject, and background all move at different rates relative to the camera. This layered motion is inherently cinematic because it creates depth that flat shots lack.
For an orbit reveal, fly in a circle around your subject while gradually increasing altitude and tilting the gimbal. This combines multiple movements into one complex but stunning shot. The subject stays centered while the world rotates around it.
Combination Reveal Shots
The most sophisticated reveal shots combine multiple techniques. You might start with a backward movement, add a rising element, and finish with a subtle orbit. These combinations create shots that feel like miniature films within themselves.
When combining movements, plan your transitions carefully. Each movement should flow naturally into the next without obvious breaks or changes in speed. Think of it like choreography for your drone.
Start with simple combinations before attempting complex ones. A backward reveal with a slight rise is easier to execute than a full orbit with simultaneous gimbal movements. Build your skills progressively.
Common Mistakes to Avoid When Doing Reveal Shots
Understanding what goes wrong is just as important as knowing what to do right. These common mistakes can ruin otherwise well-planned reveal shots.
Moving Too Fast
The most common mistake is flying too quickly. Fast movement looks impressive to the pilot but translates poorly to video. What feels like a gentle cruise in the air becomes a rushed, amateur-looking shot on screen.
Slow down dramatically. If you think you are flying slowly enough, slow down another 50 percent. The reveal should feel almost meditative, giving viewers time to absorb each stage of the emerging scene.
Jerky Gimbal Movements
The gimbal is your primary tool for creating smooth reveals, but only if you use it smoothly. Jabbing at the tilt control creates jerky footage that breaks the cinematic spell. The camera should move like honey, not like a twitch.
Practice gentle, consistent pressure on the gimbal control. Start the tilt gradually, maintain a steady rate throughout the movement, and decelerate smoothly at the end. This muscle memory takes time to develop but is essential for professional results.
Poor Composition at the End Frame
Many pilots focus so much on the movement that they neglect the final frame. Remember, this is what viewers see last. If your subject is awkwardly positioned or partially cut off, the entire shot loses impact regardless of how smooth the reveal was.
Plan your end frame before you start flying. Know exactly where you want your subject in the final composition. Fly to achieve that framing, adjusting your approach angle and speed as needed.
Ignoring Lighting Conditions
Lighting can make or break a reveal shot. Shooting into the sun without proper exposure compensation creates silhouettes that may not serve your storytelling goals. Flat, midday light makes landscapes look two-dimensional.
Scout your location at different times of day if possible. Golden hour, the period shortly after sunrise or before sunset, provides the most flattering light for aerial footage. The low sun angle creates shadows that add depth and dimension.
Not Capturing Handles
Handles are the extra seconds of footage at the beginning and end of your shot. Without them, your editing options are severely limited. You cannot extend a shot that ended exactly when the reveal completed.
Always start recording a few seconds before your actual movement begins. Continue recording for several seconds after the reveal finishes. This costs nothing but gives you invaluable flexibility in post-production.
Inconsistent Exposure
As your drone moves through different lighting conditions during a reveal, automatic exposure can create distracting brightness shifts. Your footage might get brighter or darker mid-shot, which looks unprofessional.
Lock your exposure before beginning the reveal. Most drones allow you to tap and hold on the screen to lock exposure at a specific point. Choose a setting that works for your end frame and accept that earlier parts of the shot might be slightly over or under exposed.
Practice Exercises to Master Reveal Shots
Like any skill, executing smooth reveal shots requires practice. These structured exercises will help you build muscle memory and improve your technique faster than random flying.
Exercise 1: Gimbal Control Drill
This exercise isolates gimbal control from drone movement. Hover your drone in place at a comfortable height. Practice tilting the gimbal from straight down to level, focusing on smooth, consistent speed throughout the movement.
Time yourself. A smooth tilt from bottom to top should take 5-8 seconds. Faster than that and you lose the cinematic quality. Slower is fine if you can maintain consistency. Repeat this 10 times, resting between each attempt to prevent fatigue.
Exercise 2: Straight Line Flying
Fly your drone in a perfectly straight line toward a landmark. Start 100 meters away and fly toward your target without any gimbal movement. Focus on maintaining consistent speed and direction.
Most pilots find it easier to fly in a straight line backward than forward because you can keep your eyes on the target throughout. Practice both directions until you can maintain a straight path at slow, consistent speeds.
Exercise 3: Coordinated Movement Practice
This exercise combines drone movement with gimbal control. Start with a simple backward reveal over a flat, open area. Fly backward while tilting the gimbal up. Focus on coordinating the two movements so the reveal unfolds naturally.
Do not worry about composition or subject for this exercise. The goal is to develop coordination between your flying hand and your gimbal hand. With practice, these movements become second nature, allowing you to focus on creativity rather than technique.
Exercise 4: Timed Reveal Drill
Set a target duration for your reveal shot. Start with 10 seconds from beginning to end. Time yourself as you execute the reveal, adjusting your speed to hit the target duration consistently.
Once you can reliably complete a 10-second reveal, try 15 seconds, then 20. Longer reveals require more precise control and often create more dramatic results. The key is consistency, not just hitting the time once but being able to repeat it.
Exercise 5: Altitude Variation Practice
Practice reveals at different starting altitudes. Begin some shots at 10 meters, others at 50 meters, others at 100 meters. Each altitude creates a different perspective and requires adjustments to your technique.
Higher starting points give you more room for rising reveals but can make your subject look small initially. Lower starting points create more intimate reveals but limit your vertical movement options. Understanding these tradeoffs helps you choose the right approach for each location.
When to Use Reveal Shots in Your Storytelling
The reveal shot is a tool, and like any tool, it should be used purposefully. Understanding when and why to use reveals will make your footage more impactful.
Establishing Shots and Opening Sequences
The beginning of a video sets expectations for everything that follows. A reveal shot as your opening tells viewers they are about to see something special. It creates anticipation before you have shown them anything concrete.
For travel videos, a reveal shot that exposes a stunning destination hooks viewers immediately. For real estate, revealing a property from its surroundings establishes context before showing details. The reveal works because it delays gratification, which actually increases viewer engagement.
Transition Moments
Reveal shots make excellent transitions between scenes or sections of your video. They provide a natural reset point where viewers can prepare for new information. The act of revealing something new mirrors the narrative transition.
Use reveals when moving from one location to another, or when shifting from general information to specific details. The reveal serves as a visual punctuation mark that helps organize your content.
Building Suspense and Emotional Impact
Anytime you want viewers to feel anticipation, consider a reveal shot. The gradual exposure of information creates psychological tension that resolves when the full scene comes into view. This emotional journey happens in seconds but leaves a lasting impression.
For dramatic subjects, like a mountain peak emerging from clouds or a city skyline appearing over the horizon, the reveal amplifies the natural drama of the scene. For more subtle subjects, the reveal creates drama that might not otherwise exist.
Real Estate and Commercial Applications
In real estate videography, reveal shots establish properties in their context. Start with the neighborhood or surrounding landscape, then reveal the property itself. This helps potential buyers understand not just the building but its setting.
Commercial work benefits from reveals because they look expensive. A well-executed reveal shot suggests high production value, which reflects well on the brand being featured. Even simple products look more premium when introduced through a cinematic reveal.
Travel and Destination Content
Travel videos thrive on the sense of discovery. Reveal shots capture that feeling of arriving somewhere new and seeing it for the first time. Use reveals to introduce destinations, landmarks, and hidden gems throughout your travel content.
The key is matching the reveal to the destination. A dramatic mountain range deserves a slow, sweeping reveal. A charming village might work better with a quicker, more intimate reveal. Let the character of the place guide your technique.
Frequently Asked Questions
How do I make my drone footage look more cinematic?
Focus on smooth, slow movements rather than fast, aggressive flying. Use proper camera settings with a shutter speed around twice your frame rate. Shoot during golden hour for better lighting. Master gimbal control for fluid camera movements, and always plan your shots with composition in mind.
What is the 120 meter rule for drones?
The 120 meter rule, common in many countries including FAA regulations in the US, limits drone altitude to 120 meters (400 feet) above ground level for most operations. This height restriction applies to recreational and many commercial flights unless you have specific authorization or waivers.
What makes drone footage look professional?
Professional drone footage combines smooth, controlled movements with proper camera settings and thoughtful composition. Key elements include consistent exposure, natural motion blur from correct shutter speed, steady gimbal control, and purposeful shot planning rather than random flying.
What flight mode is best for reveal shots?
Tripod mode or cinematic mode works best for reveal shots because these settings reduce joystick sensitivity for smoother movements. Some pilots prefer normal mode for more responsive control, but the key is flying slowly and smoothly regardless of which mode you choose.
How long should a reveal shot take?
A good reveal shot typically takes 8-15 seconds from start to finish. This gives viewers enough time to anticipate the reveal without the shot dragging. Longer reveals up to 20 seconds can work for particularly dramatic or complex subjects.
Do I need ND filters for reveal shots?
ND filters are highly recommended for reveal shots because they let you maintain proper shutter speed in bright conditions. Without ND filters, your shutter speed may be too fast, creating footage that looks choppy rather than smooth and cinematic.
Conclusion
The drone reveal shot is one of those techniques that immediately elevates your aerial videography. It transforms simple flyovers into cinematic moments that capture attention and tell stories. The best part is that you can start practicing today with any drone that has gimbal control.
Remember that mastering the reveal shot takes time. Start with the basic backward reveal, focusing on smooth gimbal control and consistent flying speed. Once that feels natural, explore the variations to add diversity to your footage. Each location and subject will teach you something new about timing, composition, and movement.
The key principles to carry forward are simple. Move slower than you think you need to. Coordinate your flying with your gimbal control. Always capture handles for editing flexibility. And perhaps most importantly, think like a filmmaker, not just a drone pilot. The reveal shot is a storytelling tool, and mastering it will make your drone footage truly dramatic.