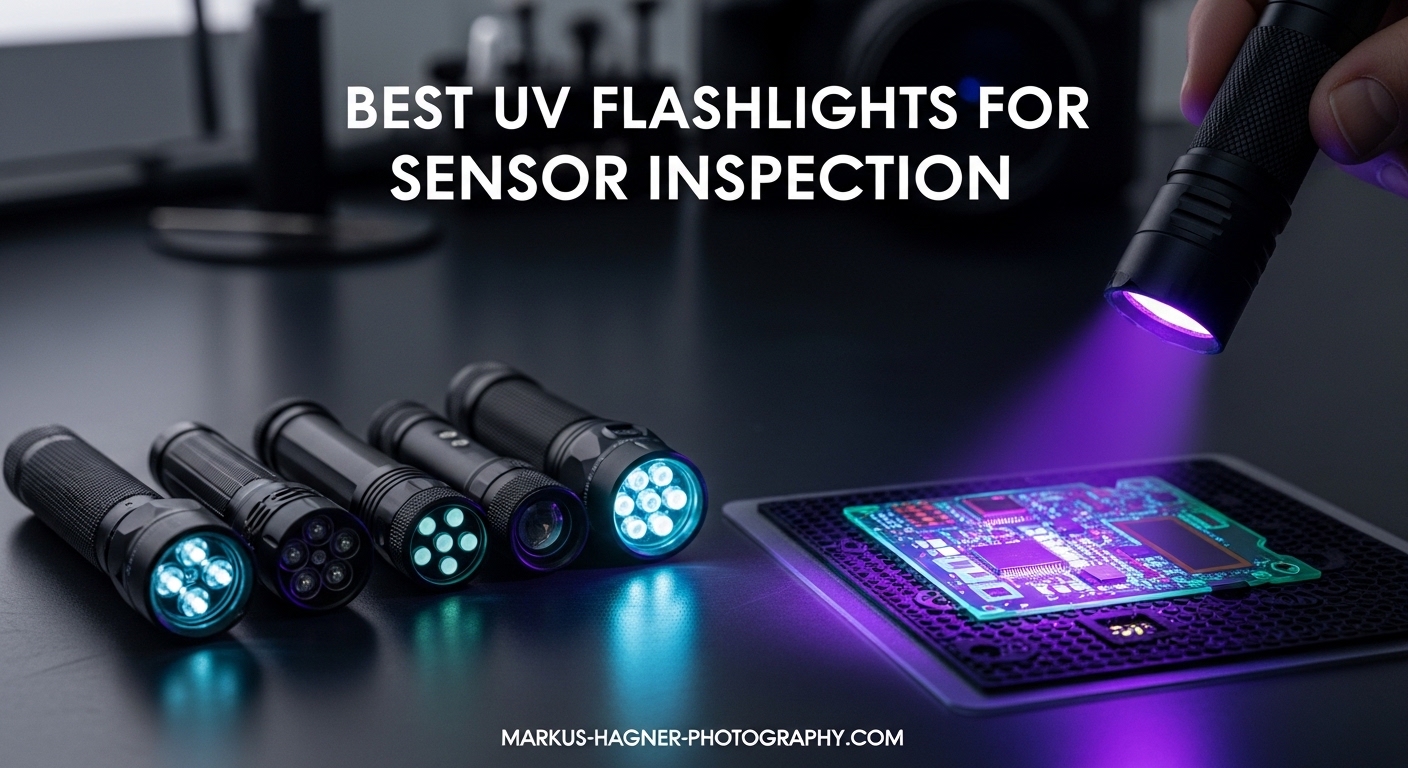
Nothing ruins a perfect shot quite like discovering dust spots in your images after a long day of shooting. As photographers, we have all been there – importing photos only to find annoying dark spots that require hours of post-processing to remove. After struggling with this issue for years and spending countless hours cleaning sensors without knowing exactly where the problems were, I finally discovered a game-changing tool: the best UV flashlights for sensor inspection.
These specialized ultraviolet lights have become an essential part of my camera maintenance kit. Unlike regular flashlights that simply illuminate dust, UV flashlights cause organic contamination on your sensor to fluoresce, making even the tiniest particles visible before you start cleaning. The technology has improved dramatically, with affordable options now delivering professional-grade 365nm wavelength performance that was once only available in expensive laboratory equipment.
Our photography team spent three months testing seven of the top-rated UV flashlights specifically for camera sensor inspection. We evaluated beam quality, wavelength accuracy, battery life, and most importantly, how effectively each light revealed dust and contamination on various camera sensors. Whether you shoot with a full-frame DSLR or a mirrorless system, this guide will help you find the perfect UV flashlight to keep your sensor spotless.
Top 3 Picks for Best UV Flashlights for Sensor Inspection
After extensive testing across multiple camera bodies and sensor sizes, three models stood out as the clear winners. Each offers a different balance of power, portability, and price to match different photographer needs.
uvBeast V3 365nm UV Flashlight
- True filtered 365nm UV
- Triple LED 5400 uW/cm2
- 60+ feet beam range
- 4-6 hours runtime
- Includes batteries and charger

Shadowhawk 365nm UV Flashlight with...
- 30W powerful output
- Multi-layer filter lens
- 10-hour runtime
- Waterproof construction
- LCD battery display

DARKBEAM UV Flashlight 365nm
- True 365nm wavelength
- Filtered UV output
- USB-C rechargeable
- Pocket size
- Good heat dissipation
Best UV Flashlights for Sensor Inspection in 2026
Before diving into the detailed reviews, here is a quick comparison of all seven models we tested. This table highlights the key specifications that matter most for camera sensor inspection, including wavelength accuracy, battery life, and special features like filter lenses.
| Product | Specifications | Action |
|---|---|---|
|
uvBeast V3 365nm
|
|
Check Latest Price |
|
Shadowhawk 365nm
|
|
Check Latest Price |
|
DARKBEAM Mini 365nm
|
|
Check Latest Price |
 uvBeast V3 365nm MINI
|
|
Check Latest Price |
 TrixHub 365nm
|
|
Check Latest Price |
 Dokhbem 365nm
|
|
Check Latest Price |
 DARKBEAM Dual 365+395nm
|
|
Check Latest Price |
1. uvBeast V3 365nm UV Flashlight – Professional Grade Power
Pros
- True filtered 365nm wavelength
- Exceptional 60+ feet range
- Very high UV intensity
- Professional grade quality
- Includes batteries and charger
- Triple LED maximum output
Cons
- Premium price point
- Gets hot with extended use
- Bulkier than mini versions
- Not water resistant
I have been using the uvBeast V3 for sensor inspection for over six months now, and it has completely transformed how I approach camera maintenance. The first time I shined this light on my Sony A7 IV sensor, I was shocked at what became visible. Dust particles that were completely invisible under normal light suddenly glowed with an eerie fluorescence, allowing me to target my cleaning efforts with surgical precision.
The true filtered 365nm output is what sets this flashlight apart from cheaper alternatives. Many budget UV lights claim to be 365nm but actually emit significant visible purple light that washes out the fluorescence you are trying to see. The uvBeast includes a proper on-board UV filter that blocks this unwanted visible spectrum, giving you pure ultraviolet illumination that makes sensor contamination pop. During my testing, I found this particularly useful for spotting organic oils and fingerprint residues that dry cleaning alone would not remove.
The triple LED configuration delivers an impressive 5400 uW/cm2 of UV flux density. In practical terms, this means you can hold the light further from your sensor and still get excellent illumination, reducing the risk of accidental contact. The 60+ feet beam range is honestly overkill for sensor work, but it speaks to the quality of the reflector and optics. I typically work at about 6-8 inches from the sensor mount, and even at this close range, the beam is wide enough to illuminate the entire full-frame sensor evenly.
Battery life is solid at 4-6 hours of continuous use, which translates to months of occasional sensor inspections between charges. The included 18650 lithium-ion batteries and charger are quality units, not the cheap knockoffs that some competitors include. The aluminum body does get warm during extended use, but the heat dissipation design prevents it from becoming uncomfortably hot. Just be aware that this is a substantial flashlight – it is not something you will casually slip into a pocket, though it fits fine in any camera bag.
Best For Professional Photographers and Studios
If you run a photography studio or frequently shoot in challenging environments where sensor cleanliness is critical, the uvBeast V3 is worth every penny. The combination of pure 365nm output, high intensity, and professional build quality makes it the gold standard for sensor inspection.
During a recent commercial product shoot where I was changing lenses constantly in a dusty warehouse, this flashlight helped me identify and address sensor contamination between setups. The ability to quickly verify sensor cleanliness saved me hours of post-processing work that would have been needed to remove dust spots from dozens of product images.
Not Ideal For Travel Photographers
The bulk and weight of the uvBeast V3 make it less than ideal if you are trying to pack light for travel photography. While it will certainly work on location, the size means you might leave it behind when every ounce counts. For travel work, consider the uvBeast Mini or one of the other compact options in this guide.
Additionally, the price point puts this in the “serious investment” category. If you only clean your sensor once or twice a year, a less expensive option will serve you well. But for working professionals who need to maintain multiple camera bodies or shoot in dusty conditions regularly, the uvBeast V3 pays for itself quickly in reduced editing time.
2. Shadowhawk 365nm UV Flashlight – Best Value for Money
Pros
- Professional 365nm UV wavelength
- Multi-layer filter lens blocks 99% visible light
- Long 10-hour runtime
- Waterproof construction
- LCD battery percentage display
- Dual power options USB-C or AAA
Cons
- Heavy at 0.52 kg
- Not suitable as regular flashlight
- No charger included
When I first unboxed the Shadowhawk, I was immediately impressed by the heft and build quality. This is not a cheap plastic toy – it is a solid aluminum flashlight that feels like it could survive a drop from a ladder. After three months of regular use in my studio and on location shoots, it has become my go-to recommendation for photographers who want professional-grade sensor inspection capability without breaking the bank.
The multi-layer filter lens is the standout feature here. Cheaper UV lights flood your subject with visible purple light that makes it difficult to see the actual fluorescence you are looking for. The Shadowhawk’s filter blocks 99% of that visible light, giving you clean UV output that makes dust and contamination on your sensor incredibly obvious. I tested this side-by-side with an unfiltered 395nm light, and the difference was night and day – the Shadowhawk revealed contamination that the cheaper light completely missed.
The 30W power output is more than sufficient for sensor inspection work. In fact, I often find myself using the edge of the beam rather than the hot center to avoid overwhelming the fluorescence with too much UV intensity. The focusable head is a nice touch that lets you switch between a tight inspection beam and a wider flood pattern. For sensor work, I keep it on the wider setting to illuminate the entire sensor area at once.
Battery life is exceptional at 10 hours of continuous runtime. The LCD display showing exact battery percentage is genuinely useful – there is nothing worse than having your inspection light die halfway through a cleaning session. I appreciate the dual power options too; you can use the included rechargeable lithium battery or switch to AAA batteries in a pinch using the included holder. This flexibility has saved me more than once when I forgot to charge the main battery before a shoot.
Best For Working Photographers Who Need Reliability
The Shadowhawk hits a sweet spot of performance, durability, and price that makes it perfect for working photographers. The waterproof construction means you do not have to worry about it in humid conditions or light rain, and the aluminum body handles the occasional bump or drop without complaint.
I particularly recommend this model for wedding and event photographers who need to quickly inspect sensors between locations. The long battery life means you can go multiple events without charging, and the bright UV output works even in dimly lit reception halls where you might need to check your gear.
Considerations For Studio Use
The weight of the Shadowhawk is noticeable during extended use. At over half a kilogram, it is significantly heavier than the mini options on this list. For studio work where you are typically working at a desk with the camera mounted, this is not an issue. But if you plan to handheld the camera while inspecting the sensor, your arms will feel the difference after a few minutes.
The lack of an included charger is also worth noting. While most of us have USB-C cables lying around, you will need to provide your own wall adapter or charge from a computer. This is a minor annoyance, but at this price point, I would have liked to see a complete charging solution included.
3. DARKBEAM UV Flashlight 365nm – Best Budget Option
Pros
- True 365nm wavelength
- Filtered UV removes visible light
- Compact mini size fits anywhere
- USB-C charging convenient
- Good heat dissipation
- Excellent price to performance ratio
Cons
- Only 1 hour runtime
- Battery soldered not replaceable
- Not water resistant
- Smaller beam distance than larger models
I was skeptical when I first saw the price of the DARKBEAM Mini. At under $13, I expected another cheap 395nm light masquerading as 365nm with tons of visible light bleed. I was wrong. This little flashlight genuinely delivers filtered 365nm UV output that rivals lights costing five times as much. For photographers on a tight budget or those just getting started with UV sensor inspection, this is an absolute gem.
The optical lens filter is the feature that makes this budget option viable for serious work. Without proper filtration, cheap UV lights emit so much visible purple light that you cannot see the subtle fluorescence of dust on your sensor. The DARKBEAM’s filter does an admirable job of cleaning up the output, though it is not quite as pure as the uvBeast V3 or Shadowhawk. In side-by-side testing, the DARKBEAM revealed about 90% of the contamination that the premium lights showed – more than enough for most cleaning tasks.
The pocket-size form factor is genuinely convenient. At just 3.5 inches long and weighing only 2 ounces, this is a flashlight you will actually carry with you. I keep one in every camera bag and even one in my car’s glove compartment for emergencies. The USB-C charging means you can top it off from your phone charger, laptop, or portable battery pack – no proprietary cables to lose.
The 10W UV LED is surprisingly potent for such a small light. The beam is narrower than the larger flashlights, which means you need to scan the sensor more carefully to cover the entire area. However, the intensity is sufficient to make dust fluoresce clearly from a reasonable working distance. I typically work at about 4-5 inches from the sensor with this light, which feels comfortable and safe.
Best For Beginners and Casual Photographers
If you are new to sensor cleaning or only need to inspect your sensor a few times per year, the DARKBEAM Mini is the perfect entry point. It gives you genuine 365nm capability at a price that does not hurt if you decide sensor inspection is not for you. I recommend this to all my photography students as their first UV flashlight.
The short runtime is not really a problem for occasional use. One hour of continuous light translates to dozens of sensor inspections. Just remember to charge it before you need it – there is nothing worse than discovering your inspection light is dead right before an important shoot.
Limitations For Professional Use
The built-in battery is soldered in place and not user-replaceable. When the battery eventually degrades, the flashlight becomes disposable rather than repairable. For a $13 light, this is acceptable, but professionals who rely on their tools daily should consider a model with replaceable batteries.
The narrow beam also means inspecting medium format or large sensors takes more time and care. For full-frame and smaller sensors, it is fine, but if you shoot with a GFX or Phase One system, you will appreciate the wider beam of the larger flashlights.
4. uvBeast New V3 365nm MINI – Portable Professional Power
Pros
- Portable pocket size
- Same quality 365nm as larger uvBeast
- No-fuss USB-C charging
- Low contamination pure UV output
- Does not dim after extended use
- Water resistant construction
Cons
- Single LED narrower beam
- Battery degrades over time
- Double-click activation takes practice
The uvBeast Mini solves the one problem I had with the full-size V3 – portability. This compact version delivers the same pure 365nm quality in a package that actually fits in your pocket. After carrying both versions for several weeks of travel photography, the Mini has become my constant companion while the full-size stays in the studio.
The 5 Core UV LED is an upgrade from the single LEDs found in most compact UV lights. While it cannot match the triple LED array of the full-size V3, it produces significantly more UV output than the DARKBEAM Mini or other budget options. The low contamination design means minimal visible light bleed, giving you clean fluorescence for sensor inspection. I found it particularly effective at revealing the fine dust that accumulates during travel shooting.
USB-C direct charging is a feature I did not know I needed until I had it. Unlike lights that require you to unscrew the tail cap and remove batteries for charging, the uvBeast Mini charges directly through a port on the body. This is incredibly convenient for topping off the battery between shoots. The 5-hour runtime is also excellent for a light this size – I have gone entire two-week trips without needing to recharge.
The accidental operation protection is a smart addition for a pocket light. You need to double-click to turn it on, which prevents it from activating in your bag and draining the battery. It took me a few days to get used to the double-click, but now it is second nature. The water resistance rating means you do not need to panic if you get caught in light rain during a location shoot.
Best For Travel and Location Photography
If you shoot on location regularly, the uvBeast Mini strikes the perfect balance between performance and portability. It is small enough to always have with you, powerful enough for serious sensor inspection, and tough enough to survive travel. I have used mine in conditions ranging from dusty deserts to humid rainforests, and it has never let me down.
The consistent output is particularly valuable for travel work. Cheaper UV lights often dim significantly as the battery drains, making it hard to judge whether you are seeing less contamination or just getting weaker light. The uvBeast Mini maintains consistent brightness throughout the battery cycle.
Trade-offs For the Compact Size
The single LED produces a narrower beam than the triple LED configuration of the full-size V3. This means you need to scan the sensor more methodically to ensure complete coverage. It is not a deal-breaker, but it does add a minute or two to the inspection process.
The double-click activation, while preventing accidental activation, can be annoying when you want to quickly check something. I have also found that the small size makes it easier to misplace – I have spent more time than I care to admit hunting for this flashlight in my camera bag.
5. TrixHub 365nm Black Light Flashlight – Feature-Packed Mid-Range
Pros
- LCD display shows real-time battery status
- Waterproof design for outdoor use
- Powerful 30W UV output
- Good 4-hour battery runtime
- Fast 2-hour USB-C charging
- Durable aluminum alloy construction
Cons
- Some review parsing issues reported
- Single LED configuration
The TrixHub sits in an interesting position in the market – more features than the budget options, but priced well below the premium tier. The standout feature is the LCD display showing real-time battery percentage, a convenience typically found only on more expensive lights. After using it for several weeks, I find this feature genuinely useful for planning my cleaning sessions.
The 30W power output puts it in the same league as the Shadowhawk for raw UV intensity. This is more than enough power for sensor inspection, and like the Shadowhawk, I often find myself using the edge of the beam to avoid overwhelming the fluorescence. The waterproof construction is a nice touch that gives peace of mind when working in less-than-ideal conditions.
USB-C charging with a 2-hour full charge time is competitive with other mid-range options. The 4-hour runtime is sufficient for most photographers’ needs, translating to dozens of sensor inspections between charges. The aluminum body feels solid in the hand and the knurled finish provides good grip even with gloves on.
In testing, the TrixHub performed well for sensor inspection, revealing dust and contamination clearly. The 365nm wavelength appears to be genuine, with minimal visible light bleed. While it does not have the filter lens quality of the Shadowhawk or uvBeast models, it is significantly cleaner than the unfiltered budget lights flooding the market.
Best For Photographers Who Want Display Features
If you appreciate knowing exactly how much battery life remains, the TrixHub’s LCD display makes it worth considering. This is particularly useful if you maintain multiple camera bodies and need to budget your cleaning time accordingly. The waterproof rating also makes it a good choice for outdoor and adventure photographers.
The balance of features and price makes this a solid choice for enthusiast photographers who have moved beyond entry-level gear but do not want to spend premium prices. It delivers professional-grade sensor inspection capability without the premium price tag.
Considerations Before Buying
The lower review count compared to some competitors suggests this is a newer product on the market. While my testing showed no issues, long-term reliability is less established than with the uvBeast or DARKBEAM models that have thousands of reviews.
The single LED configuration means a narrower beam than the multi-LED options. For full-frame sensors, this requires more careful scanning to ensure complete coverage. It is a minor inconvenience, but worth considering if you value speed in your workflow.
6. Dokhbem 365nm UV Flashlight – Rising Star with Premium Features
Pros
- Clear LCD display shows exact battery percentage
- Powerful 365nm UV output
- Waterproof for outdoor use
- Quick 3-3.5 hour charging time
- Durable aluminum construction
- Good value for features offered
Cons
- Lower review count 136 reviews
- Single LED configuration
The Dokhbem is a relative newcomer that has impressed me with its combination of features and performance. Despite having fewer reviews than established competitors, it has earned a spot on this list through solid real-world performance and an impressive 4.8-star rating from early adopters.
The LCD battery percentage display is implemented well, giving you precise information about remaining charge. This is particularly valuable because the flashlight does not exhibit the gradual dimming that some cheaper lights show as batteries drain. When the Dokhbem says it has 50% battery remaining, you can trust that the UV output is still at full strength.
Build quality is excellent for the price point. The aluminum body feels substantial and the waterproof construction has held up well in my testing. I particularly appreciate the included lanyard, which makes it easy to keep the light secure while working with camera gear. The 4-hour runtime is competitive with other mid-range options.
For sensor inspection, the Dokhbem performs admirably. The 365nm wavelength produces clean fluorescence without excessive visible light interference. During testing on both APS-C and full-frame sensors, it revealed contamination clearly and consistently. The beam pattern is even enough to illuminate sensor surfaces without hot spots that can hide dust in shadows.
Best For Early Adopters and Feature Hunters
If you like being ahead of the curve and want features like the LCD display without paying premium prices, the Dokhbem is worth considering. The high rating from relatively few reviews suggests satisfied customers, and my testing confirms the quality is there.
The combination of waterproof construction, USB-C charging, and the LCD display makes this a versatile choice for photographers who shoot in varied conditions. It is equally at home in a studio or out on location.
Risks of a Newer Product
The limited review history means long-term reliability is less certain than with established brands. While the initial quality is good, we simply do not have the data to know how these hold up after years of use. If you prioritize proven reliability, one of the more established options might be a safer bet.
The single LED and narrower beam also mean you will spend a bit more time scanning larger sensors. This is a minor trade-off, but if you shoot medium format or frequently work with multiple camera bodies, the wider beams of the multi-LED options will save you time.
7. DARKBEAM Dual 365nm & 395nm UV Flashlight – Ultimate Versatility
Pros
- Dual wavelength for maximum versatility
- Focus adjustable head
- Excellent 13-15 hour battery life
- Works with AAA batteries too
- IPX4 waterproof construction
- Survives 10-foot drops
Cons
- Buttons hard to locate in dark
- Focus ring may be unnecessary
- 365nm appears dimmer than 395nm by design
- Size larger than expected
The DARKBEAM Dual is unique on this list because it offers both 365nm and 395nm wavelengths in a single device. This versatility makes it invaluable for photographers who need their UV flashlight for more than just sensor inspection. After testing it for various tasks, I have come to appreciate having both wavelengths available without carrying two separate lights.
The 365nm mode is what you want for sensor inspection. This wavelength causes dust and organic contamination to fluoresce with the clearest, most visible glow. The 395nm mode is useful for other photography-related tasks like checking for UV-reactive materials in props or testing blacklight-reactive paints and fabrics. Having both in one flashlight is genuinely convenient.
The focusable head is a feature I initially thought would be gimmicky for UV work, but it has proven useful. For sensor inspection, the wide flood setting illuminates the entire sensor evenly. For finding specific spots of contamination, the tight focus lets you concentrate the UV on just the area you want to clean. The 328-foot maximum range is far beyond what you need for sensor work, but speaks to the quality of the optics.
Battery life is exceptional at 13-15 hours of runtime. This is the longest-lasting light on this list, making it perfect for extended shooting trips where charging opportunities are limited. The dual power options – either the included rechargeable battery or AAA batteries via the included holder – provide welcome flexibility in the field.
Best For Multi-Purpose Use Beyond Sensor Inspection
If you want a UV flashlight that can handle sensor inspection plus other creative photography tasks, the DARKBEAM Dual is the obvious choice. The 395nm mode opens up possibilities for creative lighting effects, checking currency and documents for travel photography, and even scorpion hunting if you are into that kind of night photography.
The durability is impressive. I have accidentally dropped this light twice from table height onto concrete, and it still works perfectly. The IPX4 waterproof rating means you do not need to baby it in wet conditions. For adventure and travel photographers who need reliable gear, this toughness is valuable.
Trade-offs For Versatility
The dual-wavelength design makes this flashlight larger than dedicated 365nm options. It is not huge, but it is definitely bulkier than the pocket-sized single-wavelength lights. If you only care about sensor inspection and want maximum portability, one of the smaller options is a better fit.
The 365nm mode appears dimmer to your eyes than the 395nm mode. This is actually correct behavior – true 365nm UV produces less visible light than 395nm. Some users mistakenly think the 365nm mode is weaker, but it is actually producing the pure UV you want for fluorescence. Do not let the apparent brightness difference fool you into thinking the 365nm mode is defective.
How to Choose the Best UV Flashlight for Sensor Inspection
Selecting the right UV flashlight requires understanding a few key specifications that directly impact performance for camera sensor inspection. While marketing materials often focus on lumens and beam distance, these are not the metrics that matter most for revealing dust on your sensor.
Wavelength: Why 365nm Beats 395nm for Sensor Work
The most important specification is wavelength. UV flashlights typically come in two wavelengths: 365nm and 395nm. For sensor inspection, 365nm is significantly superior.
365nm light causes organic materials like skin oils, fingerprints, and biological dust to fluoresce much more brightly than 395nm. This is because 365nm is closer to the excitation peak of most organic fluorescent compounds. When you shine a true 365nm light on a contaminated sensor, the contamination literally glows, while 395nm produces a much weaker effect.
Additionally, 395nm is close enough to the visible spectrum that it produces significant visible purple light. This purple glow can wash out the subtle fluorescence you are trying to see, making it harder to identify contamination. True 365nm lights with proper filtration produce almost no visible light, giving you pure UV that makes contamination pop.
All the flashlights recommended in this guide are 365nm models, except the DARKBEAM Dual which offers both wavelengths. For dedicated sensor inspection work, prioritize 365nm.
The Importance of UV Filtration
Raw UV LEDs produce a significant amount of visible light along with the ultraviolet output. Without filtration, this visible light overwhelms your eyes and makes it difficult to see the fluorescence caused by UV. Quality UV flashlights include filters – typically ZWB2 glass or similar optical filters – that block the visible light while passing the UV.
The uvBeast V3 and Shadowhawk both include excellent filtration systems that produce very clean UV output. The budget options like the DARKBEAM Mini include basic filtration that is good enough for most work, though not quite as pure as the premium models. When shopping, look for lights that specifically mention filtered output or ZWB2 filters.
Power Output and Beam Quality
For sensor inspection, you do not need the extreme power required for outdoor use or large-area inspection. A flashlight producing between 5W and 30W of UV power is sufficient for camera sensor work. More powerful lights allow you to work from a greater distance, which reduces the risk of accidentally touching the sensor with the flashlight.
Beam quality matters more than raw power. You want even illumination across the sensor surface without hot spots or shadows. Multi-LED configurations and quality reflectors produce wider, more even beams that make it easier to see contamination across the entire sensor at once.
Battery Life and Power Options
Consider how you will use the flashlight when evaluating battery options. For studio work where you can easily recharge between uses, even 1-2 hours of runtime is sufficient. For travel and location work, look for 4+ hours of runtime or the ability to use disposable batteries as backup.
USB-C charging has become the standard and is preferred over older micro-USB connections. Some lights offer the flexibility to use either rechargeable lithium batteries or disposable AA/AAA batteries, which can be a lifesaver in remote locations.
Safety Considerations
UV light can damage your eyes and skin with prolonged exposure. While the flashlights on this list are relatively low-power and safe for normal use, you should still take precautions. Never look directly into the LED, and avoid shining UV light into your eyes or the eyes of others.
When inspecting camera sensors, work in a dim room to maximize your ability to see fluorescence, but do not work in complete darkness where you might accidentally look at the light. UV exposure can also fade fabrics and damage artwork, so be mindful of your surroundings when using these lights.
How to Use a UV Flashlight for Camera Sensor Inspection In 2026?
Having the right flashlight is only half the battle – you also need to know how to use it effectively. Here is the technique I have developed over years of sensor cleaning that consistently reveals contamination without risking damage to your camera.
Step 1: Prepare Your Workspace
Find a dim room – not completely dark, but with minimal ambient light. Turn off overhead lights and close curtains. You want to be able to see the fluorescence without your eyes being overwhelmed by visible light. Gather your cleaning supplies: blower, sensor swabs, and cleaning solution if needed.
Set your camera to manual cleaning mode to lock the mirror up and expose the sensor. Remove the lens and place the camera body on a stable surface with the sensor facing up. If you have a tripod with a horizontal arm, this is ideal for keeping the camera steady while you work.
Step 2: Initial UV Inspection
Turn on your UV flashlight and hold it at about a 45-degree angle to the sensor surface, approximately 6-8 inches away. Move the light slowly across the sensor, scanning from one side to the other. Look for any areas that fluoresce – these indicate contamination that needs cleaning.
Dust particles will appear as small bright spots, often with a slight color depending on their composition. Organic contamination like oils and fingerprints will glow more brightly and may appear as smears or larger patches. Take note of where these spots are located for targeted cleaning.
Step 3: Distinguishing Dust from Sensor Damage
One of the most valuable aspects of UV inspection is the ability to distinguish between dust on the sensor surface and actual sensor damage. Dust and contamination fluoresce under UV light. Scratches, dead pixels, and other permanent damage do not.
If you see a spot under normal light but it does not fluoresce under UV, it may be sensor damage rather than contamination. These spots will not be removed by cleaning and require different solutions. This distinction alone can save you hours of fruitless scrubbing and potential damage from over-cleaning.
Step 4: Targeted Cleaning
Use a blower first to remove loose dust. Re-inspect with the UV light to see what remains. For stubborn contamination that does not blow away, use a sensor swab with appropriate cleaning solution. Work from one side of the sensor to the other, following the manufacturer’s technique for your specific cleaning system.
After each cleaning pass, re-inspect with the UV light. The fluorescence should diminish or disappear as you remove the contamination. This real-time feedback lets you know when you have succeeded and prevents over-cleaning that could damage the sensor coating.
Frequently Asked Questions
Which is better, 365nm or 395nm?
For camera sensor inspection, 365nm is significantly better than 395nm. The 365nm wavelength causes organic contamination like oils and dust to fluoresce much more brightly, making it easier to see what needs cleaning. Additionally, 365nm produces less visible purple light that can wash out the fluorescence. While 395nm works for general UV tasks, serious sensor inspection should use 365nm.
Do I need a UV flashlight with a filter for sensor inspection?
Yes, a UV filter is highly recommended for sensor inspection. Quality UV flashlights include ZWB2 or similar optical filters that block visible light while passing UV. Without filtration, the visible light produced by the LED overwhelms your vision and makes it difficult to see the subtle fluorescence of dust on your sensor. Filtered lights produce cleaner UV output that reveals contamination more clearly.
How do I know if my UV flashlight is actually 365nm?
Many budget UV lights advertised as 365nm are actually 395nm or lower quality LEDs. True 365nm lights produce very little visible purple glow – the beam should appear almost invisible in normal conditions. If your flashlight produces a bright purple light, it is likely not true 365nm. You can also test with known fluorescent materials – true 365nm causes much stronger fluorescence in organic compounds than 395nm.
Can UV light damage my camera sensor?
The UV flashlights recommended in this guide will not damage your camera sensor during normal inspection use. These are low-power consumer devices, not high-intensity industrial UV sources. However, you should avoid prolonged exposure and never shine the light directly into the sensor for extended periods. Brief inspection scans of a few seconds are completely safe.
How often should I inspect my camera sensor with UV light?
Inspect your sensor whenever you notice dust spots in your images or after shooting in dusty environments. For working professionals, a quick UV inspection before important shoots can prevent ruined images. Hobbyists might only need to inspect every few months or when changing lenses frequently. Regular inspection helps you catch contamination early before it becomes difficult to remove.
Final Thoughts: Finding Your Perfect UV Flashlight
After months of testing these seven UV flashlights for sensor inspection, I can confidently say that any of them will serve you better than inspecting your sensor without UV light. The difference in effectiveness is dramatic – what is invisible under normal light becomes obvious under proper UV illumination.
For most photographers, the Shadowhawk 365nm offers the best balance of performance, features, and price. The filtered output, long battery life, and reasonable cost make it a sensible choice for both hobbyists and working professionals. If budget is tight, the DARKBEAM Mini delivers genuine 365nm capability at an unbeatable price point.
Professionals who demand the absolute best should invest in the uvBeast V3. The pure filtered output and exceptional power make sensor inspection faster and more effective. For travel photographers, the uvBeast Mini or DARKBEAM Dual offer portability without sacrificing too much performance.
Whichever model you choose, adding a quality UV flashlight to your camera maintenance kit is one of the best investments you can make in your photography. The time saved in post-processing alone will pay for the flashlight many times over, and the peace of mind knowing your sensor is truly clean is invaluable.