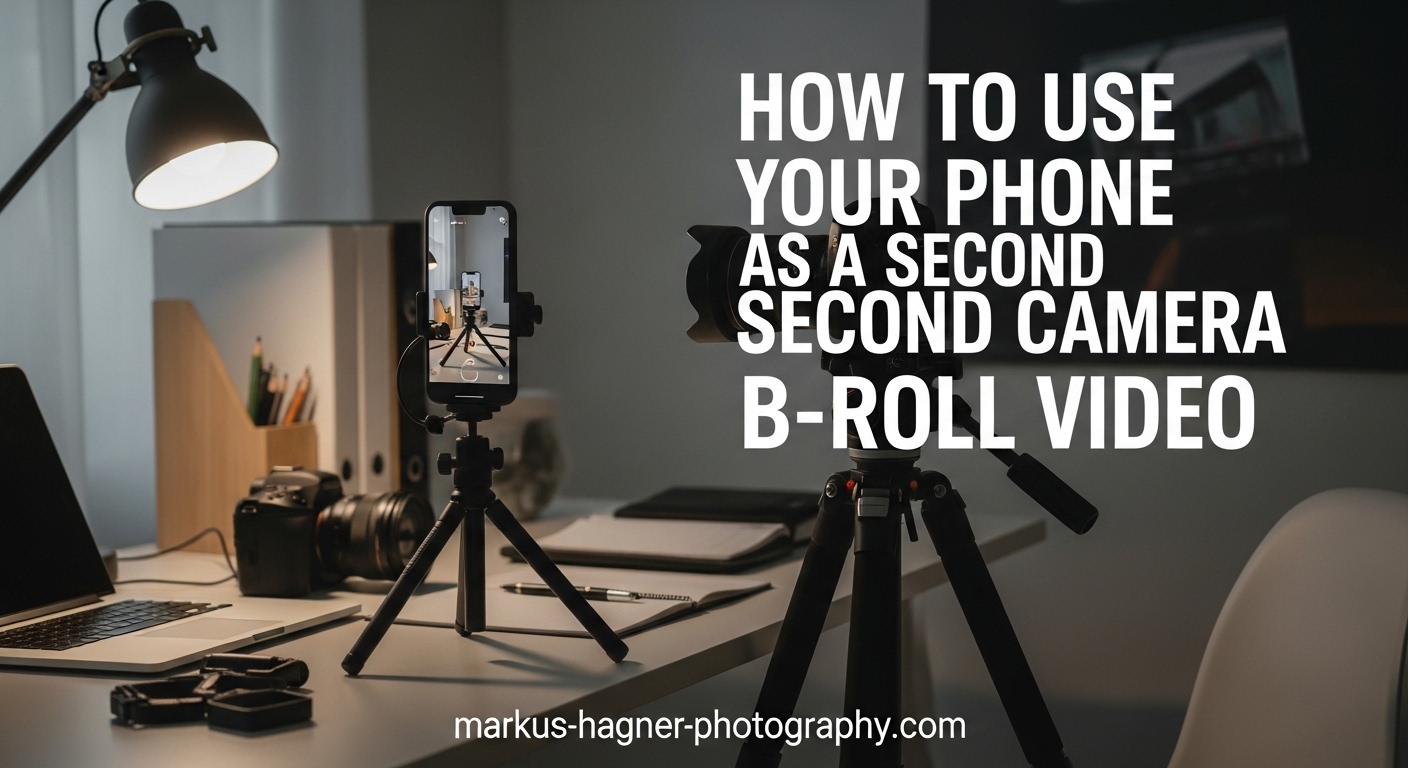
Using your phone as a second camera for b-roll video is one of the smartest ways to level up your content without spending hundreds on extra gear. I have tested this approach extensively over the past three years, and the results have genuinely surprised me. Modern smartphones capture footage that can blend seamlessly with dedicated cameras when you know the right techniques.
In this guide, you will learn exactly how to set up your phone as a secondary camera, match quality between devices, and sync everything together in post-production. We will cover built-in dual camera features, wireless apps that give you remote control, and independent recording methods. By the end, you will have a complete workflow for capturing professional-looking b-roll with equipment you already own.
What Is B-Roll and Why Use Your Phone as a Second Camera?
B-roll refers to the supplementary footage that supports your main content (called A-roll). Think of those cutaway shots in YouTube videos: hands typing on a keyboard, product close-ups, or scenic views while someone narrates. These shots add visual interest and keep viewers engaged during voiceovers or transitions.
Using your phone as a second camera makes perfect sense for several reasons. First, you already own it. Second, modern phone cameras rival entry-level dedicated cameras in good lighting. Third, phones are small, discreet, and easy to position in tight spaces where a full-sized camera will not fit. Fourth, you can start capturing b-roll immediately without switching lenses or repositioning your main setup.
I have used my phone as a b-camera for everything from talking head interviews to product demonstrations. The key is understanding how to make the footage match your primary camera so the final edit looks cohesive rather than jarring.
Three Ways to Set Up Your Phone as a Second Camera
There are three main approaches to using your phone as a second camera. Each has distinct advantages depending on your specific needs and workflow.
Method 1: Built-In Dual Camera Features
Both iPhone and Samsung phones now offer built-in features that let you record from multiple cameras simultaneously. This is the simplest approach because everything happens automatically within one device.
iPhone Dual Capture (available on iPhone 13 and newer) lets you record from the front and back cameras at the same time. Open the Camera app, switch to video mode, and look for the dual camera icon. You can choose different layouts: picture-in-picture, split screen, or side-by-side. This works brilliantly for vlog-style content where you want your reaction alongside what you are filming.
Samsung Director’s View offers similar functionality on Galaxy S21 and newer models. Open the Camera app, tap More, then select Director’s View. You will see thumbnails for each camera lens, and you can tap to switch between them while recording. The app also lets you show yourself in a small window while capturing the main scene.
The main limitation here is that you are limited to one phone. If you want a true multi-angle setup with your main camera plus phone b-roll, you will need one of the other methods.
Method 2: Wireless Camera Apps
Wireless camera apps transform your phone into a remote camera that streams directly to your computer. This approach works exceptionally well for streaming, OBS setups, and situations where you want real-time monitoring.
Here are the top apps I have tested:
EpocCam works with both iPhone and Android, connecting via WiFi or USB. The free version adds a watermark, but the paid version removes it and adds 4K support. Installation requires a small desktop app that receives the video feed.
Camo has become my go-to recommendation for quality. It supports 4K resolution, works wirelessly or via USB, and offers excellent low-light performance. The interface lets you adjust exposure, white balance, and focus remotely from your computer.
DroidCam is the best free option for Android users. It connects via WiFi, USB, or even through a web browser. The setup process takes about two minutes, and it integrates seamlessly with OBS and other streaming software.
iVCam offers solid performance for Windows users with iPhone or Android. It supports 1080p at 60fps and includes built-in camera controls for brightness and contrast.
The main downside to wireless apps is latency. There is always a slight delay between what happens and what appears on screen. This makes wireless apps better suited for b-roll and streaming rather than precise synchronization needs.
Method 3: Independent Recording and Syncing
This method gives you the most control and highest quality. You record separately on your phone and main camera, then sync everything in post-production. It requires more editing work but produces professional results.
Here is the workflow I use:
Step 1: Set up your phone on a tripod or mount in your desired position. Make sure it has a clear view of the action.
Step 2: Configure matching settings on both cameras. Use the same resolution (4K or 1080p), same frame rate (24, 30, or 60fps), and similar exposure settings.
Step 3: Before recording the actual content, create a sync marker. Clap your hands sharply in view of both cameras. This visual and audio spike makes syncing incredibly easy in editing software.
Step 4: Record your content on both devices. Try to start and stop recording at similar times to minimize file size differences.
Step 5: In your editing software, import both video files. Find the clap in each clip using the audio waveform, align them precisely, and you have perfectly synced footage.
Most modern editing programs can auto-sync based on audio waveforms. Premiere Pro, DaVinci Resolve, and Final Cut Pro all handle this automatically when you select multiple clips and choose the sync option.
Camera Settings for Matching Quality Between Cameras
Getting your phone footage to match your main camera requires attention to a few key settings. Mismatched footage screams amateur, but matched footage looks intentional and professional.
Resolution: Always match resolution between cameras. If your main camera shoots 4K, set your phone to 4K. If 1080p is your standard, stick with that. Mixing resolutions creates jarring quality jumps in your final edit.
Frame Rate: This is absolutely critical. Never mix frame rates within a single project. If your main camera records at 30fps, your phone must also record at 30fps. Mixing 24fps and 30fps creates stuttery playback that no amount of editing can fix.
Exposure and White Balance: Phone cameras aggressively adjust exposure and white balance automatically, which can create noticeable shifts during recording. Lock these settings when possible. On iPhone, tap and hold on the screen until AE/AF Lock appears. On Android, look for lock icons in pro mode or third-party camera apps.
Video Format: Some phones default to HEVC (H.265) while cameras might use H.264. This usually does not matter for the final product, but it can cause compatibility issues in older editing software. Check your phone’s camera settings if you encounter import problems.
Shooting Techniques for Phone B-Roll
Now that your phone is set up as a second camera, here are techniques that will make your b-roll footage look polished and professional.
The 30-Degree Rule
When positioning your phone as a second camera, follow the 30-degree rule from filmmaking. Your b-roll angle should differ from your main shot by at least 30 degrees. Closer angles look like mistakes rather than intentional cuts. This rule helps create visual variety while maintaining continuity.
Different Perspectives
Phones excel at getting shots that larger cameras cannot achieve. Try positioning your phone low to the ground for dramatic angles. Use it for overhead shots of your desk or workspace. Get close for detail shots of products or hands working. The small size opens creative possibilities that would require specialized rigs with traditional cameras.
Stabilization Options
Handheld phone footage often looks shaky, which breaks the professional feel. A simple tripod eliminates this problem entirely. For moving shots, a phone gimbal creates smooth, cinematic motion. I have used both the DJI OM series and Zhiyun Smooth gimbals with excellent results. They cost a fraction of camera gimbals while delivering similar stabilization quality.
If you do not have stabilization gear, tuck your elbows into your body and move smoothly. Many phones also have built-in stabilization that works surprisingly well for static shots with minor hand movement.
Lighting Considerations
Phone cameras struggle more than dedicated cameras in low light. Whenever possible, film b-roll in well-lit conditions. If you must shoot in dim environments, keep shots short and avoid fast motion that reveals noise and artifacts. Window light works beautifully for phone b-roll, and inexpensive LED panels can dramatically improve quality in darker spaces.
How to Sync Phone Footage with Your Main Camera In 2026?
Syncing footage from multiple cameras sounds complicated, but modern tools make it straightforward. Here are three approaches depending on your needs and budget.
Audio Waveform Sync: This is the most common method and works automatically in most editing software. Both cameras capture the same ambient audio (even if your phone is far from the sound source). The software analyzes the waveforms and aligns them perfectly. In Premiere Pro, select your clips, right-click, and choose Synchronize. In DaVinci Resolve, use the Auto Sync feature. This takes seconds and works remarkably well.
Visual Marker Sync: The clap method I mentioned earlier falls into this category. Any sharp visual and audio cue works: a hand clap, a camera flash, or someone saying “sync.” Find this marker in each clip during editing and align them manually. This old-school technique remains reliable when audio sync fails.
Timecode: Professional productions use timecode to keep multiple cameras perfectly synchronized. Phones do not natively support timecode, but some advanced apps can receive timecode signals over WiFi networks. This is overkill for most content creators but worth knowing about if you move toward professional multi-camera work.
Common Issues and How to Fix Them In 2026
Even with careful setup, you will encounter challenges. Here are solutions to the most common problems I have faced.
Color Mismatch: Phone cameras process video differently than dedicated cameras, often producing warmer or cooler tones. The fix happens in post-production. Apply basic color correction to your phone footage to match your main camera. Most editing programs include color matching tools that analyze reference footage and apply similar grades automatically.
Battery Drain: Recording video drains phone batteries quickly, especially at 4K resolution. Connect your phone to a power bank or wall charger during long shoots. If that is not possible, dim your screen and close background apps to extend recording time.
Storage Limits: High-quality video files are massive. A few minutes of 4K footage can consume several gigabytes. Clear unnecessary files before shooting, or use an external storage device if your phone supports it. Some phones also record directly to external drives connected via USB-C.
Wireless Latency: When using wireless camera apps, you will notice a delay between real life and what appears on screen. This is normal and unavoidable with current technology. Plan around it by using wireless feeds for b-roll that does not require precise timing, or switch to USB connections which reduce latency significantly.
Frequently Asked Questions
How to use phone as a secondary camera?
Set up your phone as a secondary camera using one of three methods: built-in dual camera features (iPhone Dual Capture or Samsung Director’s View), wireless camera apps like EpocCam or Camo that stream to your computer, or independent recording with post-production syncing. Each method works best for different situations, from casual vlogging to professional multi-camera productions.
Can I use both front and rear cameras at the same time on my iPhone?
Yes, iPhone 13 and newer models support Dual Capture mode, which records from front and back cameras simultaneously. Open the Camera app in video mode and tap the dual camera icon to enable this feature. You can choose from several layouts including picture-in-picture and split screen.
How do I sync phone footage with my main camera?
The easiest method uses audio waveform sync. Most editing software (Premiere Pro, DaVinci Resolve, Final Cut Pro) can automatically align clips based on their audio. Alternatively, create a sync marker by clapping your hands in view of both cameras before recording, then manually align the clap in your timeline.
Does Android have cinematic mode?
Android phones do not have a direct equivalent to iPhone’s Cinematic mode, but Samsung Galaxy phones offer Director’s View which provides similar multi-camera recording capabilities. Third-party apps like Filmic Pro also offer advanced focus pulling and depth effects for Android users seeking cinematic looks.
Conclusion
Using your phone as a second camera for b-roll video transforms your production quality without additional investment. Whether you choose built-in dual camera features for quick setups, wireless apps for streaming workflows, or independent recording with post-sync for maximum control, the fundamentals remain the same: match your settings, stabilize your shots, and sync carefully in editing.
Start with the simplest method that fits your needs and experiment from there. Your phone is capable of producing excellent b-roll footage. The techniques in this guide will help you unlock that potential and create more dynamic, engaging videos. Remember to keep your lens clean, match frame rates between cameras, and use the clap sync method when automatic tools fail.