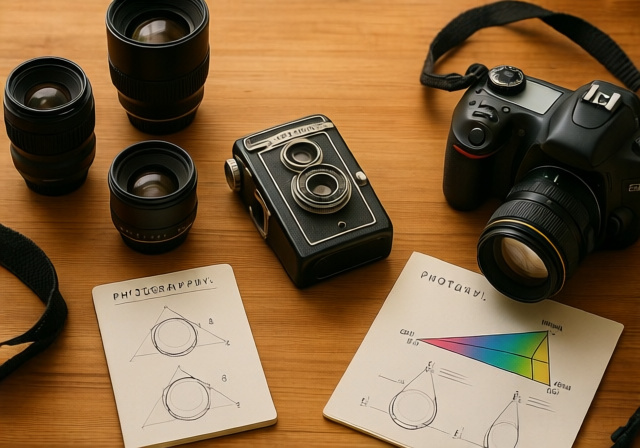
Ever sat in a photography group conversation and felt completely lost when people started throwing around terms like “bokeh,” “chromatic aberration,” or “f-stop”? You’re not alone. I’ve been there too – scrolling through photography forums feeling intimidated by the technical jargon that seems to come so naturally to experienced photographers.
Photography camera terms are the specialized vocabulary photographers use to describe equipment, techniques, and concepts in their craft. These terms create a standardized language that allows precise communication about everything from camera settings to artistic vision. Understanding this terminology is your gateway to moving from “point and shoot” to intentional, creative photography.
After teaching photography for over 15 years and helping hundreds of beginners overcome their fear of technical language, I’ve learned that the key is learning terms in context, not as a dry dictionary. This guide organizes photography terminology the way you’ll actually encounter it – starting with the absolute essentials you need today, then progressively building to more advanced concepts.
By the end of this guide, you’ll not only understand the vocabulary but also know how to apply each concept to create better images. Let’s turn that confusing jargon into your creative toolkit.
Essential Foundation Terms Every Photographer Must Know In 2026
These five terms form the bedrock of photography. Master these first, and everything else will fall into place naturally. I call them the “big five” because they appear in 90% of photography discussions.
The Exposure Triangle: The relationship between aperture, shutter speed, and ISO that determines your image’s brightness. All three work together – change one, and you must adjust at least one other to maintain the same exposure.
1. Aperture (or f-stop)
Aperture is the opening in your lens that lets light pass through to the sensor. Think of it like your eye’s pupil – it gets wider in dark conditions and smaller in bright light. Aperture is measured in f-stops (f/1.8, f/4, f/11, etc.), and here’s the tricky part that confuses everyone: smaller numbers mean wider openings.
I remember spending weeks trying to remember this. Here’s a trick that finally stuck: f/1.8 is like having 1.8 pizzas to share (small number, big slices), while f/16 is like having 16 pizzas (big number, tiny slices). Wider apertures (small f-numbers) create that beautiful blurry background called bokeh, while narrower apertures (large f-numbers) keep more of your scene sharp.
2. Shutter Speed
This is exactly what it sounds like – how long your camera’s shutter stays open. Measured in fractions of a second (1/1000s) or whole seconds (30s). Fast shutter speeds freeze motion (think sports photography), while slow speeds create motion blur (think silky waterfalls or light trails).
Here’s a practical example from my early days: I kept getting blurry photos of my kids playing. The problem? I was using 1/60s shutter speed indoors. Once I learned to use at least 1/250s for active children, my success rate skyrocketed.
3. ISO
Pronounced “eye-so,” not “eye-ess-oh” (yes, I made this mistake for months). ISO is your camera’s sensitivity to light. Low ISO (100-400) for bright conditions, high ISO (1600+) for dark situations. But higher ISOs add digital noise or grain to your images.
Modern cameras are amazing at high ISOs. My first DSLR was unusable above ISO 800. Today’s cameras can produce clean images at ISO 6400 and beyond. The rule of thumb: always use the lowest ISO you can while maintaining proper exposure with your chosen aperture and shutter speed.
4. Depth of Field
This refers to how much of your image is in sharp focus from front to back. Shallow depth of field (blurry background) comes from wide apertures, while deep depth of field (everything sharp) comes from narrow apertures.
Portrait photographers love shallow depth of field to make subjects pop. Landscape photographers typically want deep depth of field to keep everything from foreground flowers to distant mountains sharp. Your choice of depth of field is one of the most creative decisions you’ll make as a photographer.
5. Exposure
Simply put, exposure is the total amount of light reaching your sensor. Too much light = overexposed (blown out highlights). Too little light = underexposed (lost detail in shadows). Proper exposure captures detail in both highlights and shadows.
Your camera’s light meter helps you judge exposure, typically showing a scale from -3 to +3. Zero is theoretically perfect, but don’t be afraid to intentionally over or underexpose for creative effect. I often underexpose sunset photos by -1 to make colors more vibrant.
Camera Equipment & Settings Terminology
Understanding camera equipment terms helps you make smarter purchasing decisions and use your gear more effectively. Let’s break down the essential vocabulary you’ll encounter.
Camera Types
DSLR (Digital Single-Lens Reflex)
The traditional digital camera with a mirror that reflects light up to the optical viewfinder. When you take a photo, this mirror flips up, the shutter opens, and light hits the sensor. DSLRs offer excellent battery life and optical viewfinders that show exactly what the lens sees.
Mirrorless Camera
The modern alternative that removes the mirror mechanism. Light goes directly to the sensor, and you view through an electronic viewfinder or LCD screen. Benefits include smaller bodies, silent shooting, and usually better video capabilities. The trade-off is typically shorter battery life.
Point and Shoot
Compact cameras with fixed lenses where the camera does most of the work. Great for travel and everyday photography when you don’t want to carry bulky gear.
Medium Format
Professional cameras with sensors larger than full-frame, offering incredible detail and dynamic range. These are the cameras you see in high-end fashion and product studios, costing as much as a car.
Sensor Sizes
| Sensor Size | Description | Best For |
|---|---|---|
| Full Frame | Same size as 35mm film (36x24mm) | Professional work, low light, portraits |
| APS-C | Smaller than full frame (23.5×15.6mm) | General photography, wildlife (crop factor advantage) |
| Micro Four Thirds | Even smaller (17.3x13mm) | Travel, video, compact systems |
The crop factor is crucial – an APS-C sensor has a 1.5x crop, meaning your 50mm lens acts like a 75mm lens. This is great for wildlife photography but challenging for wide-angle shots.
Lens Terminology
Prime Lens
A lens with a fixed focal length (can’t zoom). Prime lenses are typically sharper, lighter, and have wider apertures than zoom lenses. A 50mm f/1.8 is often called the “nifty fifty” – an inexpensive prime that every beginner should own.
Zoom Lens
A lens with variable focal length (can zoom in and out). More versatile but often compromise on image quality and maximum aperture. A 24-70mm f/2.8 is the workhorse for many professional photographers.
Focal Length
Measured in millimeters, determines your field of view. Shorter numbers = wider view (14mm = ultra-wide). Longer numbers = narrower view (200mm = telephoto). On a full-frame camera, 50mm approximates human eye vision.
Wide Angle Lens
Typically under 35mm, great for landscapes, architecture, and interior shots. Be careful – wide angles can distort features when used too close to subjects.
Telephoto Lens
Typically over 70mm, brings distant subjects closer. Essential for wildlife and sports photography. A 70-200mm is a classic telephoto zoom.
Macro Lens
Designed for extreme close-up photography, usually 1:1 magnification (life-size on sensor). Perfect for flowers, insects, and product photography.
Camera Settings & Modes
Shooting Modes
- Auto: Camera makes all decisions. Good for emergencies, but you’re not really photography.
- Program (P): Auto but you can adjust some settings. A step up from full auto.
- Aperture Priority (A/Av): You set aperture, camera chooses shutter speed. Most used mode by experienced photographers.
- Shutter Priority (S/Tv): You set shutter speed, camera chooses aperture. Great for sports or action.
- Manual (M): You control everything. The professional mode that gives complete creative control.
Focus Settings
Autofocus (AF): Your camera does the focusing work. Modern AF systems are incredibly sophisticated with eye detection, tracking, and hundreds of focus points.
Manual Focus (MF): You turn the focus ring yourself. Essential for macro photography, low light situations, and when autofocus struggles.
Focus Points: The areas in your viewfinder where the camera can focus. Modern cameras have dozens or hundreds of these, arranged in patterns or covering the entire frame.
White Balance
Adjusts colors to match the light source. Auto white balance works well most of the time, but specific presets (daylight, shade, tungsten, fluorescent) give more accurate results in tricky lighting. Custom white balance using a gray card gives the most accurate colors.
File Formats
RAW
Unprocessed data directly from your camera’s sensor. Like a digital negative. RAW files contain much more information than JPEGs, allowing incredible flexibility in post-processing. Every serious photographer shoots in RAW.
JPEG
Compressed image files processed in-camera. Smaller files and ready to use straight out of camera, but limited editing flexibility. Good for snapshots and when you need to save space.
TIFF
Uncompressed format that preserves quality but creates very large files. Used mainly for professional printing and archival purposes.
Lighting & Exposure Terminology
Light is everything in photography. Understanding lighting terminology helps you see and control light more effectively, transforming your images from snapshots to art.
Types of Light
Natural Light
Light from the sun or sky. The quality changes dramatically throughout the day. Midday sun is harsh and creates strong shadows. Early morning and late afternoon light is soft and directional – often called “golden hour” for its warm, flattering qualities.
Ambient Light
The existing light in a scene, whether natural or artificial. Working with ambient light means using what’s available rather than adding your own light sources.
Artificial Light
Any man-made light source – lamps, flashes, studio lights. Artificial light gives you complete control but requires more equipment and knowledge.
Light Quality
Hard Light
Direct, focused light that creates sharp shadows with well-defined edges. Think midday sun or direct flash. Hard light can be dramatic but often unflattering for portraits.
Soft Light
Diffused light that creates gentle shadows with soft edges. Think overcast day or light through a sheer curtain. Soft light is flattering for portraits and product photography.
Studio Lighting Patterns
Three-Point Lighting
The foundation of studio lighting with three lights:
- Key Light: Main light source, usually positioned at 45 degrees to the subject
- Fill Light: Softer light filling in shadows created by the key light
- Back Light (Rim Light): Light from behind creating separation from background
Light Modifiers
Tools that shape and control light:
- Softbox: Creates soft, directional light
- Umbrella: Spreads light over a larger area
- Reflector: Bounces light to fill shadows
- Diffuser: Spreads light to make it softer
- Grid: Narrows light beam for more control
- Gobo: Goes between light and subject to create patterns
Exposure Concepts
Metering
How your camera measures light to determine exposure. Most cameras offer several metering modes:
- Matrix/Evaluative: Reads the entire scene and averages
- Center-Weighted: Emphasizes the center of the frame
- Spot: Measures only a small spot (usually where you’re focusing)
Exposure Compensation
Deliberately making your image brighter or darker than the camera’s recommended exposure. Use + (plus) to brighten, – (minus) to darken. Essential for tricky lighting situations like backlit portraits or snow scenes.
Dynamic Range
The range of tones from pure black to pure white that your camera can capture in one exposure. Scenes with extreme brightness differences (like sunset shots) often exceed your camera’s dynamic range, requiring techniques like HDR or bracketing.
Bracketing
Taking multiple shots at different exposures. Most common is auto bracketing – one shot at normal exposure, one darker, one brighter. These can be combined later for HDR or to ensure you get the perfect exposure.
Highlights, Shadows, Midtones
The three zones of brightness in your image. Understanding how to read and adjust these is key to editing. Generally, you want detail in your highlights (avoid blown-out whites) and shadows (avoid pure black), with most information in the midtones.
Composition & Photography Techniques
Composition is how you arrange elements in your frame. These terms represent the guidelines and techniques photographers use to create visually compelling images.
Composition Rules
Rule of Thirds
Divide your frame into a 3×3 grid and place key elements along these lines or at their intersections. This creates more dynamic and interesting compositions than centering everything. Most cameras can display this grid as an overlay.
Leading Lines
Use natural or man-made lines to guide the viewer’s eye through your image. Roads, fences, rivers, or even shadows can serve as leading lines that create depth and movement.
Framing
Use elements in the foreground to frame your main subject. Doorways, windows, tree branches, or arches can create natural frames that add depth and context to your images.
Symmetry and Patterns
Look for natural symmetry in architecture, nature, or human-made elements. Patterns create visual rhythm, while breaking a pattern creates interest and focus.
Depth
Create a sense of three-dimensionality by including foreground, middle ground, and background elements. This is especially important in landscape photography.
Balance
Distribute visual weight in your frame. Can be symmetrical (equal elements on both sides) or asymmetrical (different elements that balance each other visually).
Shooting Techniques
Panning
Follow a moving subject with your camera using a slow shutter speed. This keeps the subject sharp while blurring the background, creating a sense of motion. Great for cars, bikes, or running animals.
Long Exposure
Using shutter speeds of one second or longer to blur motion. Common uses include silky water effects, light trails from traffic, or star trails. Requires a tripod and often neutral density filters in daylight.
High-Speed Photography
Freezing fast motion using very fast shutter speeds (1/1000s or faster). Captures moments invisible to the human eye like water droplets, balloons popping, or hummingbird wings.
Macro Photography
Extreme close-up photography of small subjects. Requires special lenses or extension tubes. Focus stacking (combining multiple images at different focus points) is often used to achieve sufficient depth of field.
Time-Lapse Photography
Taking photos at intervals and combining them to show motion over time. Clouds moving across the sky, flowers blooming, or construction projects are popular time-lapse subjects.
Creative Effects
Bokeh
The quality of out-of-focus areas in your image. Good bokeh is smooth and pleasing, while bad bokeh can be distracting. Controlled by aperture, lens design, and distance to subject/background.
Chromatic Aberration
Color fringing along high-contrast edges, usually purple or green. Caused by lens imperfections. Most modern lenses and software can correct this, but understanding it helps when choosing lenses.
Vignetting
Darkening of image corners, either naturally from the lens or added in post-processing. Can add focus to your subject or be an unwanted artifact depending on your intent.
Golden Hour
The first hour after sunrise and last hour before sunset. Light is soft, warm, and directional, creating flattering illumination for almost any subject.
Blue Hour
The period just before sunrise and after sunset when the sky has a deep blue color. Perfect for cityscapes and moody landscapes.
Advanced & Professional Photography Terms (2026)
These terms separate the amateurs from the professionals. Understanding and using this vocabulary correctly shows you’re serious about photography.
Technical Terms
Bit Depth
The amount of color information per pixel. 8-bit = 256 levels per color channel. 12-bit = 4,096 levels. 16-bit = 65,536 levels. Higher bit depths give more editing flexibility but create larger files.
Color Space
The range of colors your camera can capture or your monitor can display. sRGB is standard for web. Adobe RGB has a wider gamut for printing. ProPhoto RGB is even wider but requires careful workflow management.
Moiré
Strange wavy patterns that appear when photographing fine regular patterns. Caused by interference between the pattern and your camera’s sensor. Some cameras have anti-aliasing filters to reduce this.
Diffraction
Loss of sharpness at very small apertures (f/16, f/22, etc.). Caused by light bending as it passes through small openings. Every lens has a sweet spot where it’s sharpest, usually 2-3 stops down from maximum aperture.
Circle of Confusion
Technically, the smallest blur point that our eyes perceive as sharp. Practically, it’s part of what determines depth of field calculations. Don’t worry too much about this one unless you’re into lens testing.
Professional Slang
Chimping
Constantly checking your LCD screen after every shot. Named after the “ooh-ooh-aah-aah” sounds photographers make when they see a good shot. frowned upon in professional settings but we all do it.
Glass
Professional term for lenses. “I need to get some new glass” means “I want to buy new lenses.”
Fast Glass
Lenses with wide maximum apertures (f/2.8 or wider). They’re “fast” because they let in more light, allowing faster shutter speeds.
Prime Time
When you’re shooting with prime lenses instead of zooms. Often associated with a more deliberate, thoughtful approach to photography.
Available Dark
Photographer’s dark humor for shooting in very low light conditions without flash. “I was working with available dark” means it was really, really dark.
Spray and Pray
Shooting as many frames as possible hoping one will be good. The opposite of carefully composed, deliberate photography.
Industry Terms
Workflow
Your complete process from shooting to final image. Includes import, culling, editing, and export. A consistent workflow is crucial for professional efficiency.
Culling
The process of selecting the best images from a shoot. Professionals often shoot hundreds but only keep a handful. Be ruthless in your culling – only keep your absolute best.
Post-Processing
Everything you do to your images after shooting. Includes organization, editing, color correction, and output. Sometimes called “post” for short.
Color Grading
The art of adjusting colors for mood and style. Beyond simple correction, grading creates a consistent look across a series of images.
Retouching
Detailed editing to remove blemishes, distractions, or enhance features. Portrait retouching requires subtlety – the goal is enhancement, not creating a different person.
Export
The final step of saving your edited image in the appropriate format for its intended use (web, print, social media).
Business Terms
Usage Rights
How and where images can be used. Different from ownership – photographers usually own the copyright but license usage rights to clients.
Work for Hire
When the client owns all rights to the images. Generally unfavorable for photographers unless compensated appropriately.
Model Release
Legal document giving permission to use a person’s likeness. Essential for commercial use of identifiable people in photos.
Property Release
Similar to model release but for private property. Needed for commercial use of recognizable buildings or private land.
Call Sheet
Detailed schedule and information for a photo shoot. Includes times, locations, contact info, and shot lists. Professional shoots always use call sheets.
Quick Reference A-Z Guide
Here’s a compact alphabetical reference for quick lookups. Each term includes a difficulty rating: [B] Beginner, [I] Intermediate, [A] Advanced
Aperture [B] – Lens opening controlling light and depth of field
Aperture Priority [B] – Camera mode where you set aperture
APS-C [I] – Sensor size smaller than full frame
Aspect Ratio [I] – Proportions of image width to height
Bit Depth [A] – Color information per pixel
Bokeh [I] – Quality of out-of-focus areas
Bracketing [I] – Multiple exposures at different settings
Chimping [A] – Constantly checking LCD screen
Chromatic Aberration [A] – Color fringing on high-contrast edges
Circle of Confusion [A] – Technical term for perceived sharpness
Color Space [I] – Range of colors (sRGB, Adobe RGB)
Composition [B] – Arrangement of elements in frame
Crop Factor [I] – How smaller sensors affect focal length
Depth of Field [B] – Zone of acceptable sharpness
Diffraction [A] – Sharpness loss at small apertures
DSLR [B] – Digital Single-Lens Reflex camera
Dynamic Range [I] – Range from darkest to lightest tones
Exposure [B] – Total amount of light reaching sensor
Exposure Compensation [I] – Deliberately over/under exposing
Exposure Triangle [B] – Aperture, shutter speed, ISO relationship
Fast Glass [A] – Lenses with wide apertures
F-Stop [B] – Measurement of aperture size
Full Frame [I] – Sensor size equal to 35mm film
Focal Length [B] – Field of view of lens (mm)
Focus [B] – Making subject sharp
Golden Hour [I] – First/last hour of daylight
Gray Card [I] – Card for accurate white balance
HDR [I] – High Dynamic Range imaging
Highlights [I] – Brightest parts of image
ISO [B] – Camera sensor sensitivity to light
JPEG [B] – Compressed image format
Manual Mode [I] – Full manual control of settings
Macro [I] – Extreme close-up photography
Medium Format [A] – Large professional cameras
Metering [I] – How camera measures light
Midtones [I] – Middle brightness values
Mirrorless [B] – Cameras without mirror mechanism
Moiré [A] – Pattern interference artifacts
Noise [B] – Digital grain at high ISOs
Overexposed [B] – Too bright, lost highlight detail
Panoramic [I] – Wide aspect ratio images
Panning [I] – Following moving subject with camera
Point and Shoot [B] – Simple compact cameras
Prime Lens [I] – Fixed focal length lens
Program Mode [B] – Auto with some manual controls
RAW [I] – Unprocessed image data
Resolution [B] – Image dimensions in pixels
Rule of Thirds [B] – Composition guideline
Shutter Priority [B] – Camera mode where you set shutter speed
Shutter Speed [B] – How long shutter stays open
Stop [I] – Doubling or halving of light
Telephoto [B] – Long focal length lens
TIFF [A] – Uncompressed image format
Underexposed [B] – Too dark, lost shadow detail
Vignetting [I] – Darkening of image corners
White Balance [B] – Color temperature adjustment
Wide Angle [B] – Short focal length lens
Zoom Lens [B] – Variable focal length lens
Putting Photography Terms into Practice
Knowledge becomes power when applied. Here are practical exercises to reinforce your understanding of photography terminology.
Weekly Practice Exercises
Week 1: Master the Exposure Triangle
- Set your camera to Manual mode
- Find a static subject in consistent light
- Take the same shot at f/4, f/8, and f/16, adjusting shutter speed each time to maintain exposure
- Review how depth of field changes
- Repeat with ISO changes to see noise differences
Week 2: Composition Practice
- Spend one day focusing only on Rule of Thirds
- Next day, look only for leading lines
- Practice framing with natural elements
- Try breaking all rules deliberately to see the difference
Week 3: Lighting Exploration
- Shoot the same subject in hard light and soft light
- Practice during golden hour and midday
- Try window light portraits at different times of day
- Experiment with exposure compensation in different lighting
Common Troubleshooting Scenarios
Problem: Images are always blurry
Solutions: Check shutter speed (use at least 1/60s handheld), clean your lens, check autofocus mode, try manual focus if AF is struggling, increase ISO for faster shutter speeds.
Problem: Colors look wrong
Solutions: Adjust white balance, shoot in RAW for more flexibility, check for color casts in processing, use a gray card for custom white balance.
Problem: Photos look flat
Solutions: Improve lighting (move to better light or add lights), check exposure (avoid underexposure), adjust contrast in post, consider composition to add depth.
Problem: Can’t get everything sharp
Solutions: Use smaller aperture (larger f-number), check hyperfocal distance, focus stack multiple images, understand your lens’s sweet spot.
Building Your Photography Vocabulary
Learning photography terminology is like learning any language – immersion and practice are key. Here’s how to accelerate your learning:
- Join photography communities – Reddit’s r/photography and local camera clubs are great for learning terminology in context
- Watch photography tutorials – YouTube channels like Tony & Chelsea Northrup or Peter McKinnon use terminology naturally
- Read camera reviews – Professional reviews explain technical terms in real-world contexts
- Teach others – Nothing solidifies knowledge like explaining concepts to beginners
- Shoot daily – Apply terms in real situations, not just theory
Frequently Asked Questions
What are good keywords for photography?
Essential photography keywords include aperture, shutter speed, ISO, composition, lighting, focus, lens, camera, exposure, and depth of field. These fundamental concepts form the foundation of photography and appear in most photography discussions and tutorials.
What are the 7 basic parts of a camera?
The seven basic parts of a camera are: 1) Camera body (the main housing), 2) Lens (focuses light), 3) Image sensor (captures light), 4) Shutter (controls exposure time), 5) Aperture (controls light amount), 6) Viewfinder (shows the scene), and 7) LCD screen (for reviewing images and menu navigation).
What is the 3/4 rule in photography?
The 3/4 rule in photography actually refers to a common misconception – people often mean the Rule of Thirds. The Rule of Thirds divides your frame into a 3×3 grid and suggests placing key elements along these lines or at their intersections for more dynamic compositions.
What is the 100 rule in photography?
The 100 rule in photography suggests using a shutter speed of at least 1/100s when shooting hand-held to avoid camera shake. Some variations use 1/focal length (use 1/100s for 100mm lens), while others suggest doubling to 1/200s for crop sensor cameras.
What are the 7 elements of photography?
The seven elements of photography are: 1) Line (leading and structural), 2) Shape (two-dimensional forms), 3) Form (three-dimensional shapes), 4) Texture (surface quality), 5) Color (hue, saturation, brightness), 6) Value (lightness and darkness), and 7) Space (positive and negative areas).
How long does it take to learn photography terminology?
Basic photography terminology can be learned in a few weeks of regular study and practice. Most photographers become comfortable with essential terms within 2-3 months of consistent shooting. Advanced terminology and professional jargon may take 6-12 months to master fully.
Your Photography Journey Continues
You’ve taken the first step in demystifying photography terminology. Remember, every professional was once a beginner staring at their camera manual in confusion. The key is consistent practice and not being afraid to ask questions.
Photography is a journey of continuous learning. Master these terms, then explore genre-specific vocabulary for your interests – whether that’s portrait lighting terminology, landscape composition concepts, or street photography techniques. The more you shoot, the more these terms become second nature.
Most importantly, don’t let terminology intimidate you. These terms are just tools to help you express your creative vision. Focus on making images that move you, and the technical knowledge will follow naturally.