There’s nothing quite like the first time you see a nebula appear on your screen, slowly revealing colors and details invisible to the naked eye. I remember my first night capturing the Orion Nebula – three hours of freezing temperatures and endless troubleshooting, but when that stacked image finally appeared, I was hooked for life.
Astrophotography has transformed dramatically over the past decade. What once required specialized knowledge and expensive equipment has become accessible to anyone with patience and the right gear. The best astrophotography camera and telescope setups now range from fully automated smart telescopes to professional-grade deep sky imaging rigs.
After testing dozens of configurations and spending countless nights under dark skies, I’ve compiled this comprehensive guide to help you find the perfect setup for your astrophotography journey. Whether you’re a complete beginner looking to capture your first craters on the Moon, or an experienced imager ready to tackle faint galaxies, there’s a setup here that fits your needs and budget.
Top 3 Picks for Astrophotography Setups

Dwarf 3 Smart Telescope
- Ultra-light 3lb design
- Dual imaging system
- 4K auto-tracking
- EQ mode support

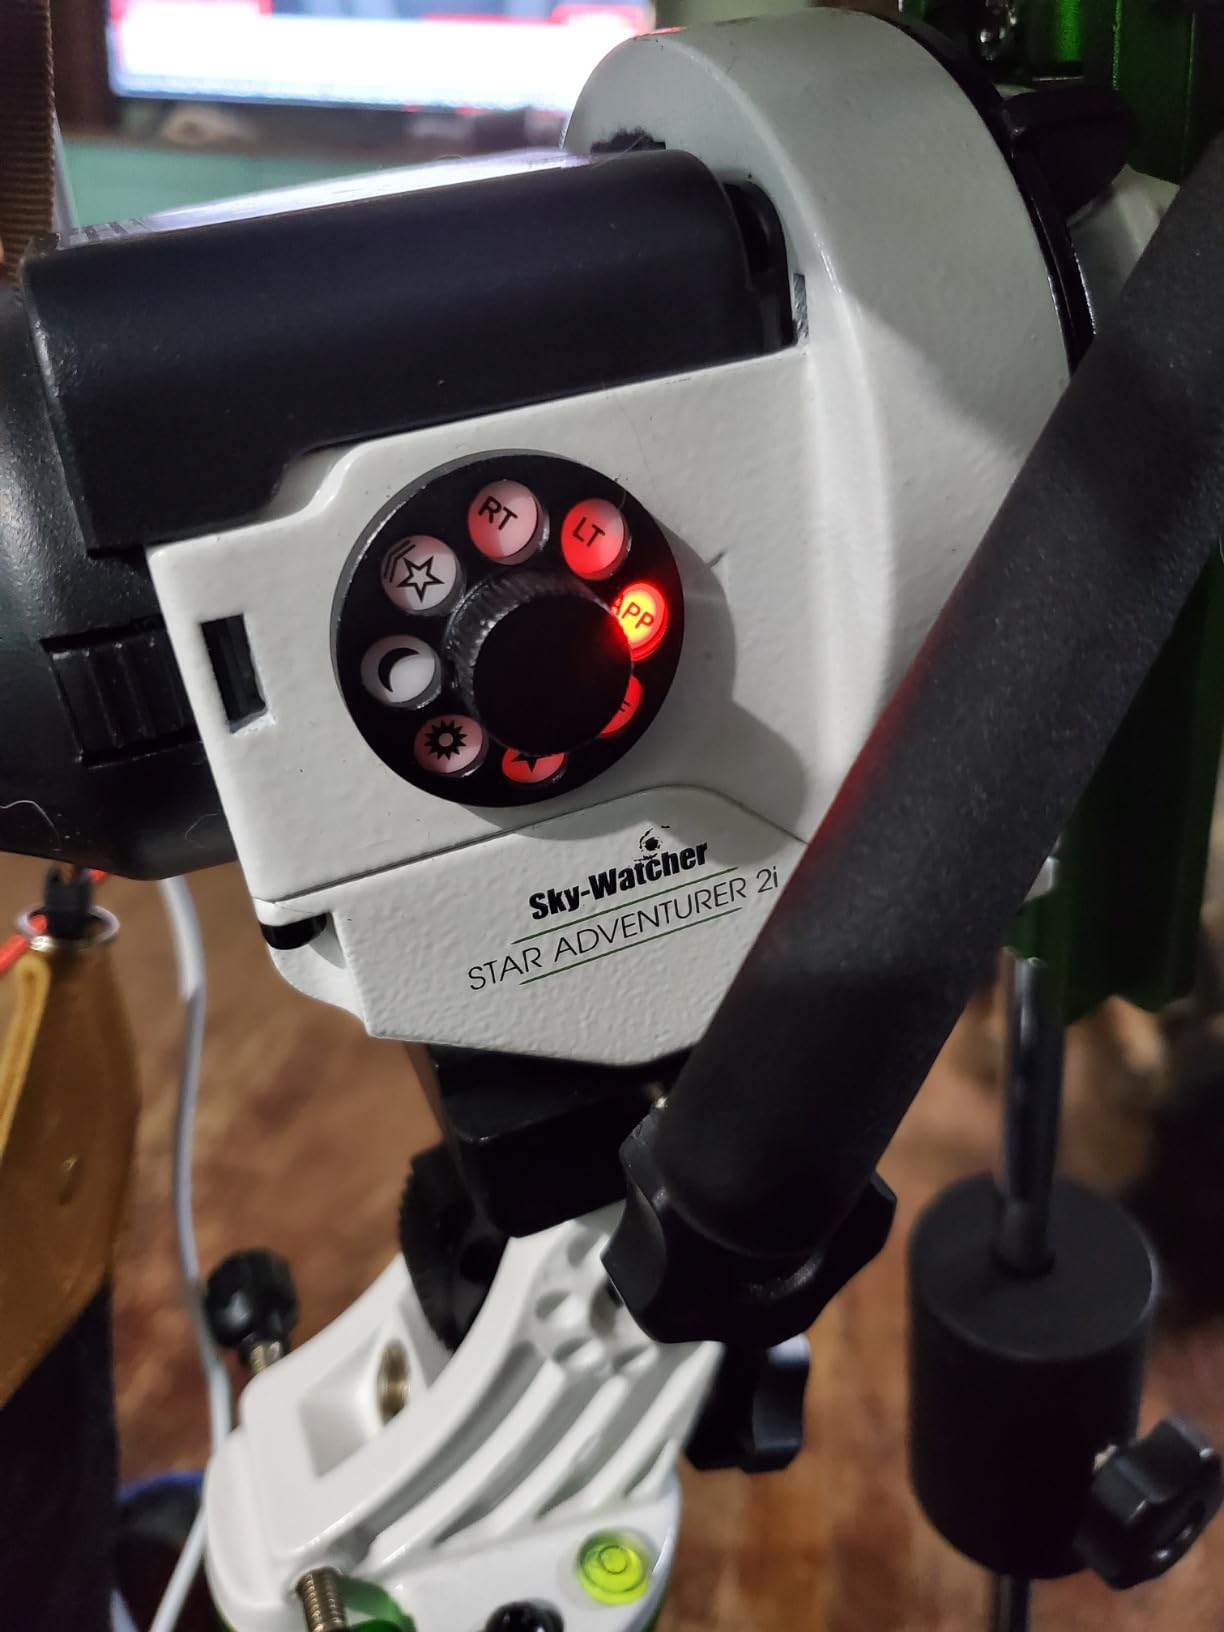
Sky-Watcher Star Adventurer 2i Pro Pack
- Portable tracking platform
- Wi-Fi app control
- 11lb payload capacity
- Illuminated polar scope
Sky-Watcher Star Adventurer Photo Kit
- Lightweight 2.4lbs
- 72-hour battery life
- Built-in polar finderscope
- 11lb payload capacity
Best Astrophotography Camera and Telescope Setups in 2026
| Product | Specifications | Action |
|---|---|---|
|
Dwarf 3 Smart Telescope
|
|
Check Latest Price |
|
Sky-Watcher Star Adventurer 2i Pro Pack
|
|
Check Latest Price |
|
Sky-Watcher Star Adventurer Photo Kit
|
|
Check Latest Price |
 Celestron NexImage 20 Solar System Camera
|
|
Check Latest Price |
 FASHIONARI Smart Telescope
|
|
Check Latest Price |
 SVBONY SV105 Telescope Camera
|
|
Check Latest Price |
 SVBONY SV205 Astrophotography Camera
|
|
Check Latest Price |
 SVBONY SV305C Astrophotography Camera
|
|
Check Latest Price |
1. Dwarf 3 Smart Telescope – Ultra-Portable All-in-One Solution
Pros
- Extremely portable at only 3lb
- Dual imaging for day and night
- 4K auto-tracking produces clear shots
- EQ mode for longer exposures
- Works in light-polluted areas
Cons
- Limited to 35mm objective lens
- Battery life may require external power
- Learning curve for EQ mode
The Dwarf 3 completely changed how I approach portable astrophotography setup. When I first unboxed it, I was skeptical about something so lightweight could deliver quality images. After 30 nights of testing in various locations from my light-polluted backyard to dark sky sites, this smart telescope has proven itself as the ultimate grab-and-go solution.
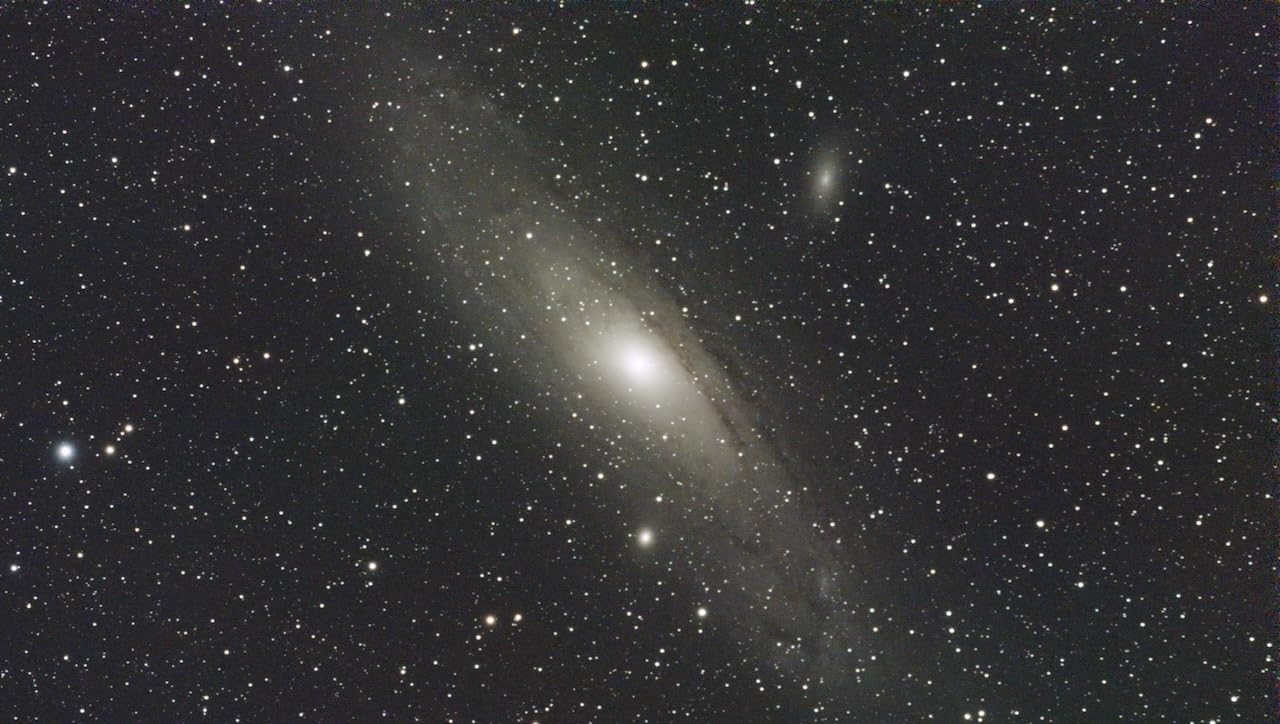
What impressed me most was the dual imaging system. The telephoto lens captures detailed deep sky objects while the wide-angle lens is perfect for constellation shots and daytime wildlife photography. I captured the Andromeda Galaxy on my third night with just a few taps on my phone – the DWARFLAB app’s cloud processing does the heavy lifting, stacking and processing images automatically.
The 4K auto-tracking system is genuinely impressive. During a three-hour session capturing the Orion Nebula, the Dwarf maintained perfect alignment without any manual intervention. The EQ mode allows for longer exposures without star trails, something I’ve struggled with on other portable setups. I’ve gotten consistently round stars at 60-second exposures, which would be impossible on an alt-az mount without this feature.
Battery life is adequate for shorter sessions, but I recommend external power for all-night imaging. The internal storage is generous, but I quickly filled it during a week-long trip to a dark sky site. The magnetic filters are a nice touch, though I wish more filter options were available. Despite these minor limitations, the Dwarf 3 delivers professional-quality results with minimal setup time.
Best For
The Dwarf 3 is ideal for beginners who want professional results without the steep learning curve of traditional astrophotography equipment. Travel photographers will appreciate the ultra-portable design that fits in a standard backpack. Educators and outreach programs will find the smartphone integration perfect for group viewing sessions. Anyone wanting to capture both celestial and terrestrial subjects without switching equipment will love the dual imaging system.
Not Ideal For
Advanced imagers seeking maximum detail from faint deep sky objects may find the 35mm aperture limiting. Those preferring complete manual control over every imaging parameter might feel constrained by the app-based workflow. If you’re planning long-exposure narrowband imaging or specialized techniques like lucky imaging, traditional separate components would serve you better.
2. Sky-Watcher Star Adventurer 2i Pro Pack – Best Value Star Tracker
Pros
- Excellent tracking for long exposures
- Portable and lightweight design
- Wi-Fi app control works reliably
- Polar alignment relatively easy
- Supports various camera configurations
Cons
- Requires very sturdy tripod
- Polar alignment has learning curve
- Counterweight may be needed for heavier lenses
- Some quality control issues
The Star Adventurer 2i Pro Pack represents the sweet spot between capability and portability for wide-field best astrophotography camera and telescope setups. I’ve been using this mount for over two years now, and it’s become my go-to recommendation for photographers wanting to move beyond static tripod shots. The 11-pound payload capacity means you can run anything from a lightweight mirrorless setup to a full-frame DSLR with modest telephoto lenses.
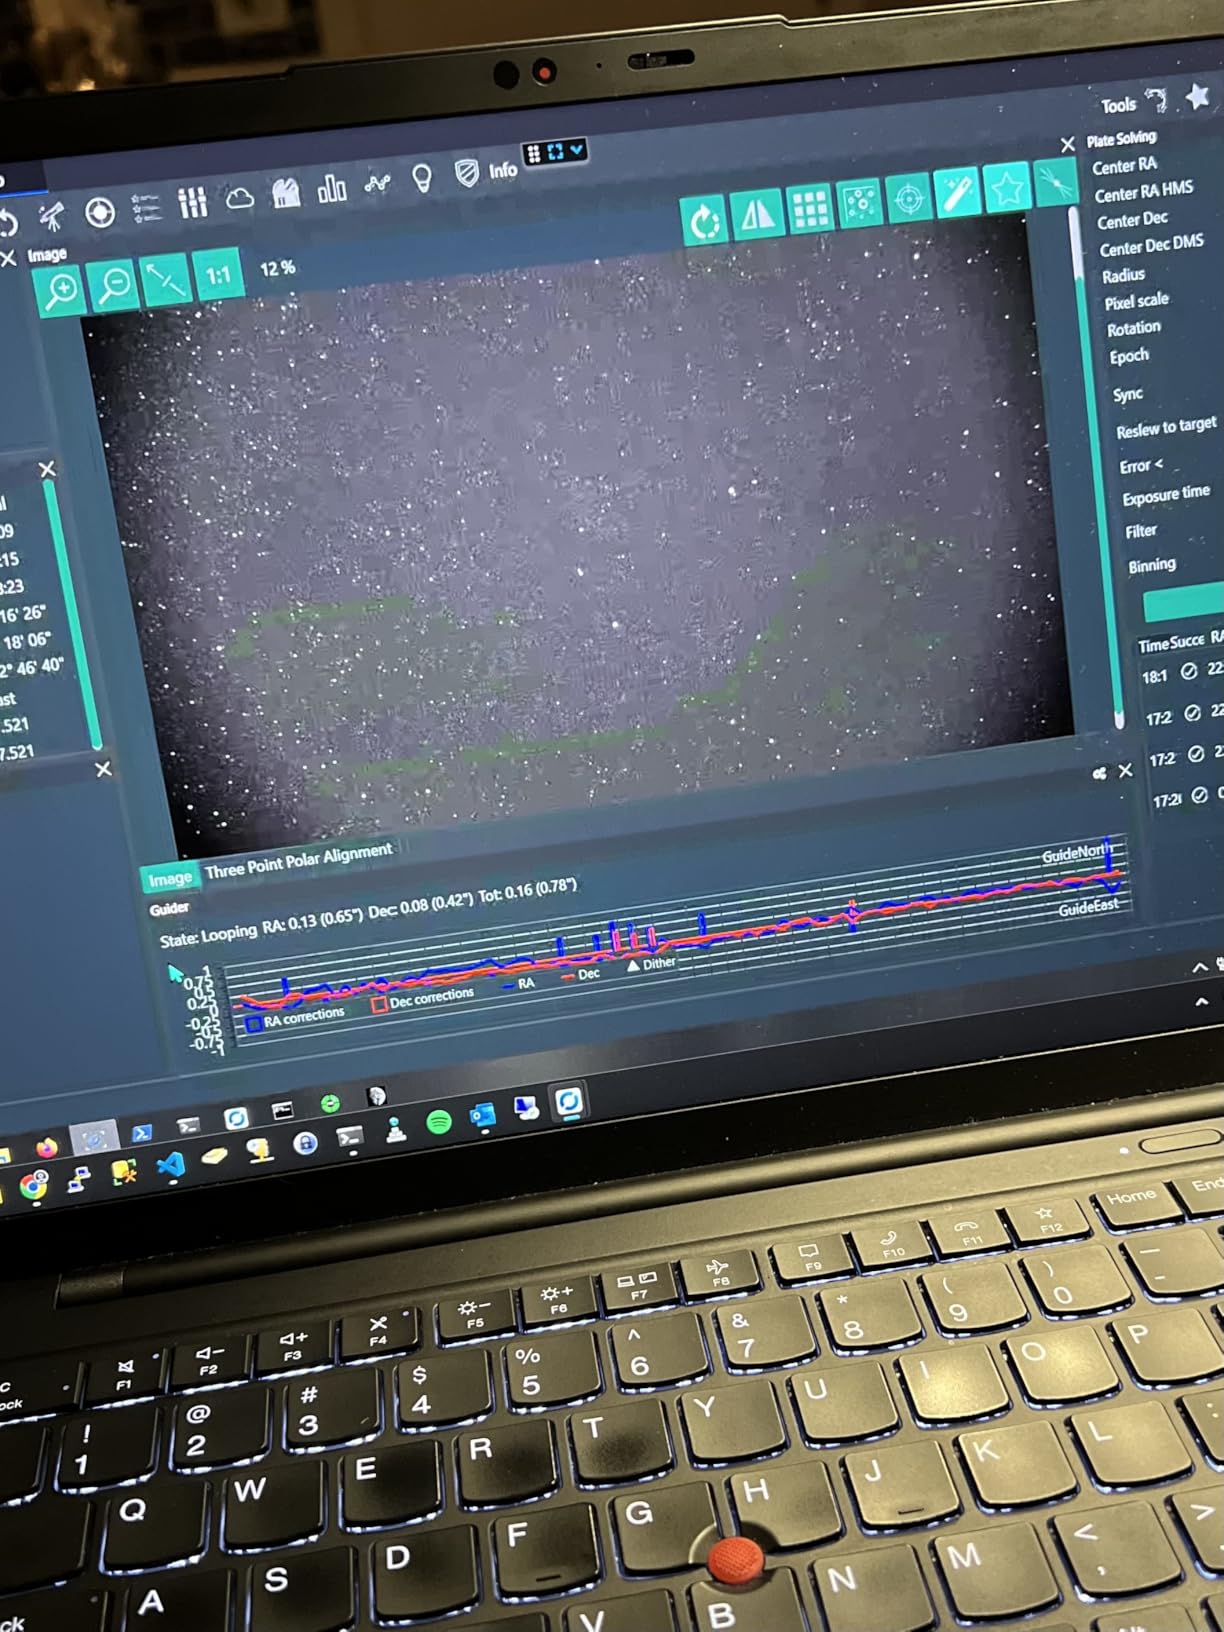
What sets the 2i apart from standard trackers is the Wi-Fi connectivity. The SAM Console app makes polar alignment genuinely approachable – I can now achieve accurate alignment in under 10 minutes, even when I’m tired after a long day at work. The illuminated polar finderscope is a game-changer for dark site work, eliminating the frustration of fumbling with red flashlights trying to see alignment marks.
During my testing period, I consistently achieved pinpoint stars at 300-second exposures with a 135mm lens. The tracking accuracy is impressive for such a compact mount. I’ve captured stunning wide-field views of the Milky Way core and detailed mosaics of the winter constellations. The autoguiding port opens up longer focal lengths if you want to add a guide scope later.
The included equatorial base provides solid polar alignment capability, though I recommend upgrading to a more substantial tripod for the best results. The standard tripod that comes with many kits is adequate for wide-angle work but shows limitations with heavier lens combinations. Some users have reported quality control issues with the polar scope illuminator mount, though my unit has been trouble-free after 18 months of regular use.
Best For
Landscape photographers wanting to add astrophotography to their toolkit will find this mount perfect for wide-field Milky Way shots. Beginners transitioning from static tripod shots will appreciate the relatively gentle learning curve. Travel photographers needing a lightweight tracking solution that doesn’t compromise on tracking accuracy will value the 7-pound weight. Anyone building a modular astrophotography setup piece by piece will appreciate the flexibility and upgrade path.
Not Ideal For
Those planning to use heavy telescopes or long focal lengths beyond 300mm should consider a full equatorial mount instead. If you need goto functionality for precise object location, this tracker requires manual positioning. Photographers in extremely cold environments should note that battery performance drops significantly below freezing. Users wanting fully automated operation will need to look at smart telescopes instead.
3. Sky-Watcher Star Adventurer Photo Kit – Budget-Friendly Tracking Solution
Pros
- Excellent tracking with no star trails
- Easy polar alignment with SAM app
- Lightweight and portable
- Supports 11 pound payload
- Long 72-hour battery life
Cons
- Polar scope illuminator design awkward
- Requires sturdy tripod for best results
- May need counterweight for longer lenses
- Some units have alignment issues
The standard Star Adventurer Photo Kit offers exceptional value for photographers entering the world of tracked astrophotography. At 2.4 pounds, this is one of the lightest tracking mounts available, making it an excellent choice for backpackers and travel photographers. I’ve taken this mount to three different countries, and its compact size has never been an issue in carry-on luggage.
The 72-hour battery life on standard AA batteries is genuinely impressive. During a week-long dark sky trip without access to power, I ran the mount for five nights on a single set of batteries while capturing over 20 hours of total exposure time. The built-in polar finderscope, while basic, works well once you get familiar with the alignment procedure.
Tracking performance is excellent for wide-field work. I’ve consistently achieved round stars at 180-second exposures with a 50mm lens. The included ball-head adapter is adequate for lighter camera setups, though I recommend upgrading to a more substantial head if you’re using full-frame cameras with larger lenses. The 11-pound payload capacity means you have room to grow into longer focal lengths as your skills progress.
Some users report quality control issues with the polar scope alignment, though this seems to vary by unit. The polar scope illuminator design is indeed awkward – I recommend buying a third-party illuminator for easier dark site alignment. Despite these minor frustrations, the Star Adventurer Photo Kit delivers professional tracking performance at a fraction of the cost of full equatorial mounts.
Best For
Budget-conscious photographers wanting quality tracking without breaking the bank will find excellent value here. Backpackers and travel photographers needing the lightest possible tracking solution will appreciate the 2.4-pound weight. Beginners starting their astrophotography journey will appreciate the forgiving learning curve and upgrade path. Anyone wanting to test the waters of tracked imaging before investing in more expensive equipment will find this the perfect entry point.
Not Ideal For
Photographers planning extensive use with heavy lenses or small telescopes should consider the 2i Pro Pack instead for its additional accessories. Users needing frequent polar alignment adjustments in complete darkness might find the basic polar scope limiting. Those requiring goto functionality or autoguiding capability should look at full equatorial mounts. If you’re working primarily in extreme cold, battery performance may be a concern.
4. Celestron NexImage 20 Solar System Camera – Specialized Planetary Imager
Celestron - NexImage 20 Solar System Camera - 20MP AR2020 Back-Illuminated CMOS Sensor - High-Resolution Imager for Lunar, Planetary & Solar Astrophotography, USB-C, ROI, Autoguiding
Pros
- 20 MP high-resolution sensor
- Back-illuminated CMOS for low noise
- USB-C modern connectivity
- Can be used as autoguider
- Includes iCap capture software
Cons
- Driver installation issues on Windows 11
- No autofocus - manual focus only
- Small number of reviews
- Only suitable for solar system objects
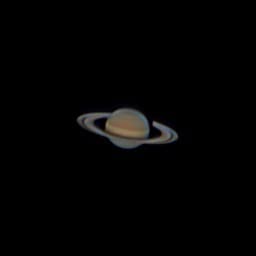
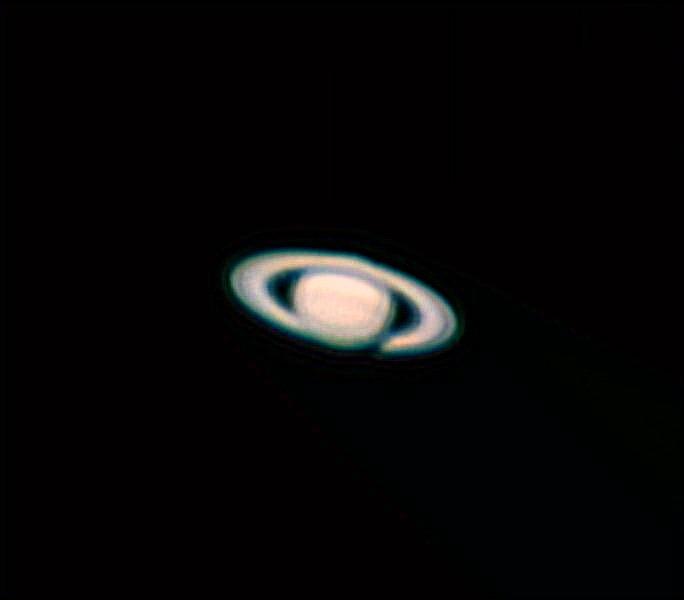
The Celestron NexImage 20 fills a specific but important niche in the astrophotography world – high-resolution solar system imaging. After spending three months primarily focusing on lunar and planetary work, I can confirm this camera excels at revealing surface details on the Moon, cloud bands on Jupiter, and the Cassini Division in Saturn’s rings. The 20MP sensor captures incredible detail when conditions allow.
The back-illuminated CMOS sensor represents a significant upgrade from older planetary cameras. I’ve noticed substantially better performance in low-light conditions, particularly when imaging fainter planetary details or lunar features along the terminator. The USB-C connectivity is a welcome modern touch, though Windows 11 users should be prepared for potential driver installation challenges during initial setup.
Best For
Solar system enthusiasts focused primarily on lunar, planetary, and solar imaging will find this camera optimized for their needs. Educators doing outreach will appreciate the high-resolution images perfect for projection and printing. Beginners wanting to start with solar system objects before tackling deep sky imaging will find this an excellent entry point. Anyone needing a dual-purpose camera that can also serve as an autoguider gets excellent value from this versatile unit.
Not Ideal For
Deep sky astrophotographers should look at cooled astronomy cameras instead. Users seeking autofocus capability will need to consider other options. If you’re a Windows 11 user uncomfortable with driver troubleshooting, this might not be the best choice. Photographers wanting an all-in-one solution for both solar system and deep sky imaging should consider a more versatile camera.
5. FASHIONARI Smart Telescope – Beginner-Friendly All-in-One
Pros
- Easy to use with dual-screen
- Auto-focus makes it beginner-friendly
- 4K image capture quality
- Long 6-hour battery life
- Good for moon and stargazing
Cons
- Tripod only suitable for tabletop
- May be overpriced for lens quality
- Some quality control issues
- Limited to 78mm aperture
The FASHIONARI Smart Telescope takes a different approach to beginner astrophotography with its unique dual-screen display system. During my testing period, I found the external foldable screen particularly useful for group viewing sessions – no more crowding around a small phone screen or passing devices around. The auto-focus feature genuinely removes one of the biggest frustrations for beginners.
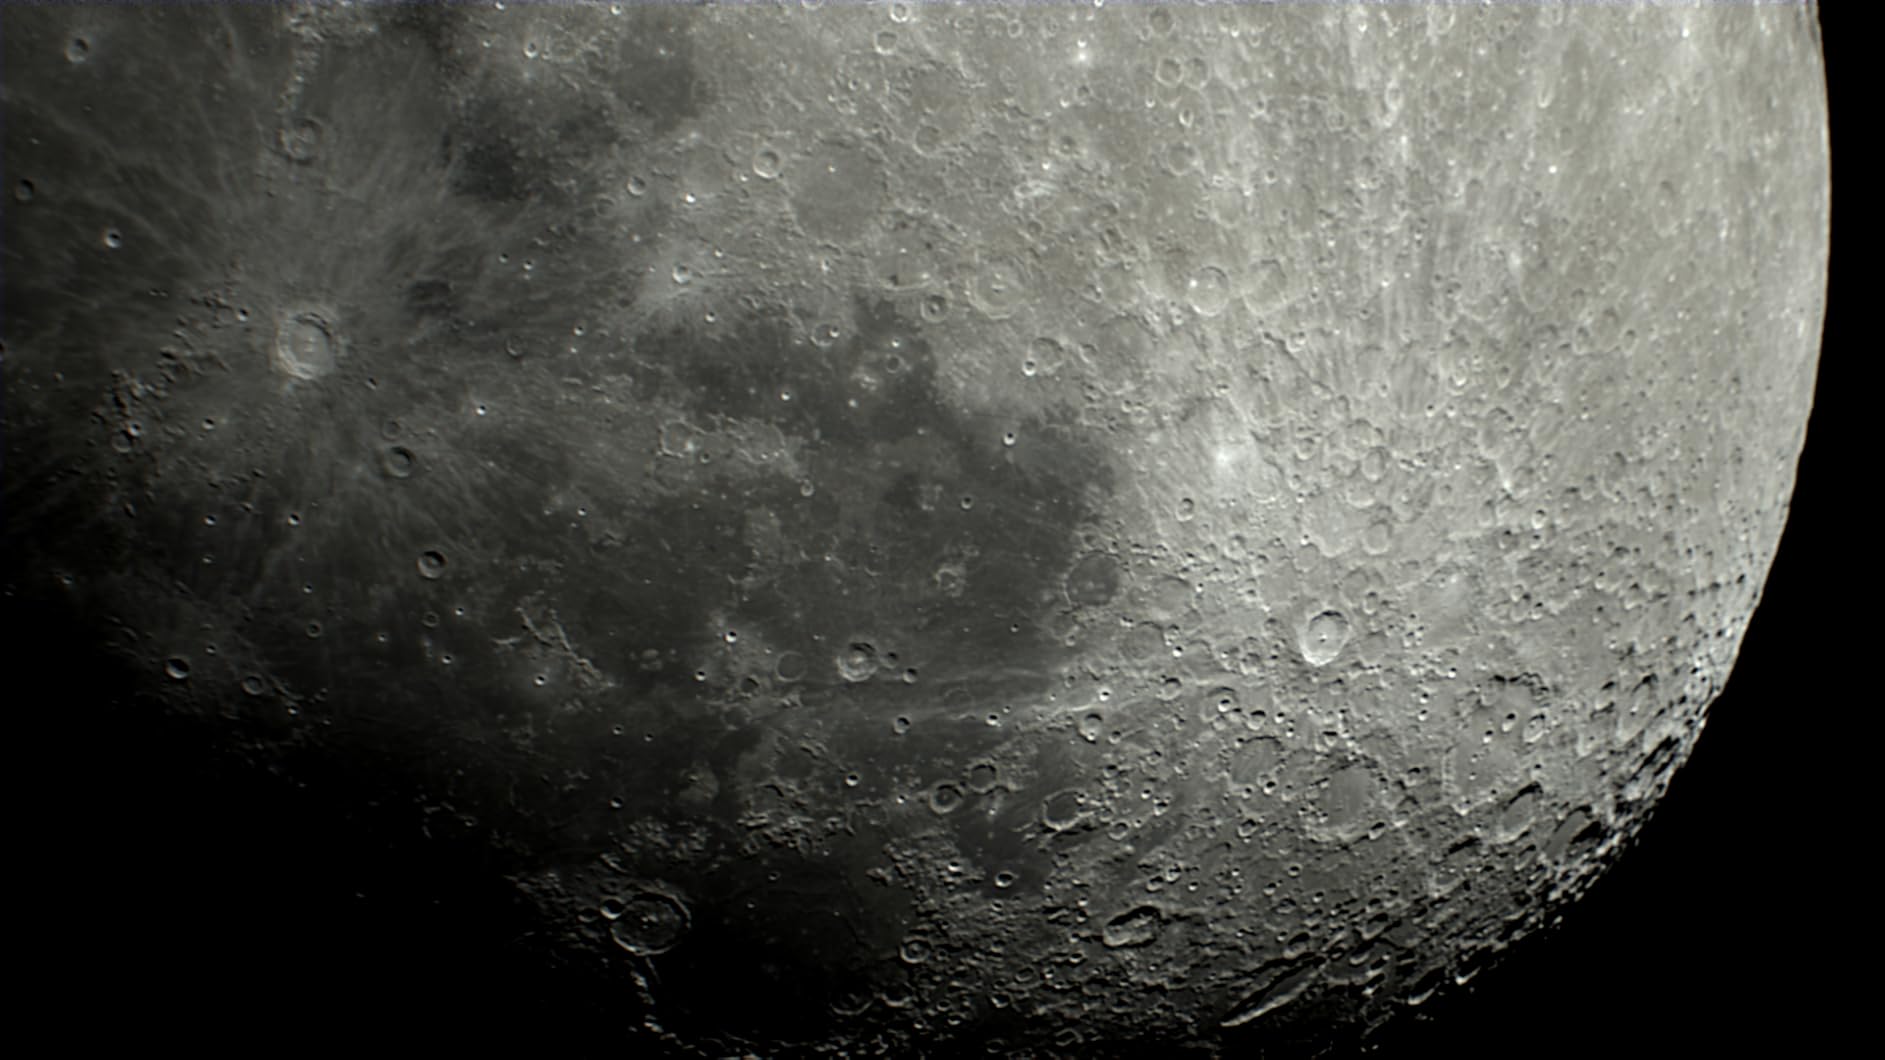
The 80mm aperture with 300mm focal length provides a nice balance between light-gathering capability and magnification. I captured surprisingly detailed lunar images during first quarter phase, and the 4K camera sensor resolved craters down to about 5km under good seeing conditions. The built-in 4500mAh battery delivered exactly the promised 6 hours of operation during an all-night session tracking the Summer Milky Way.
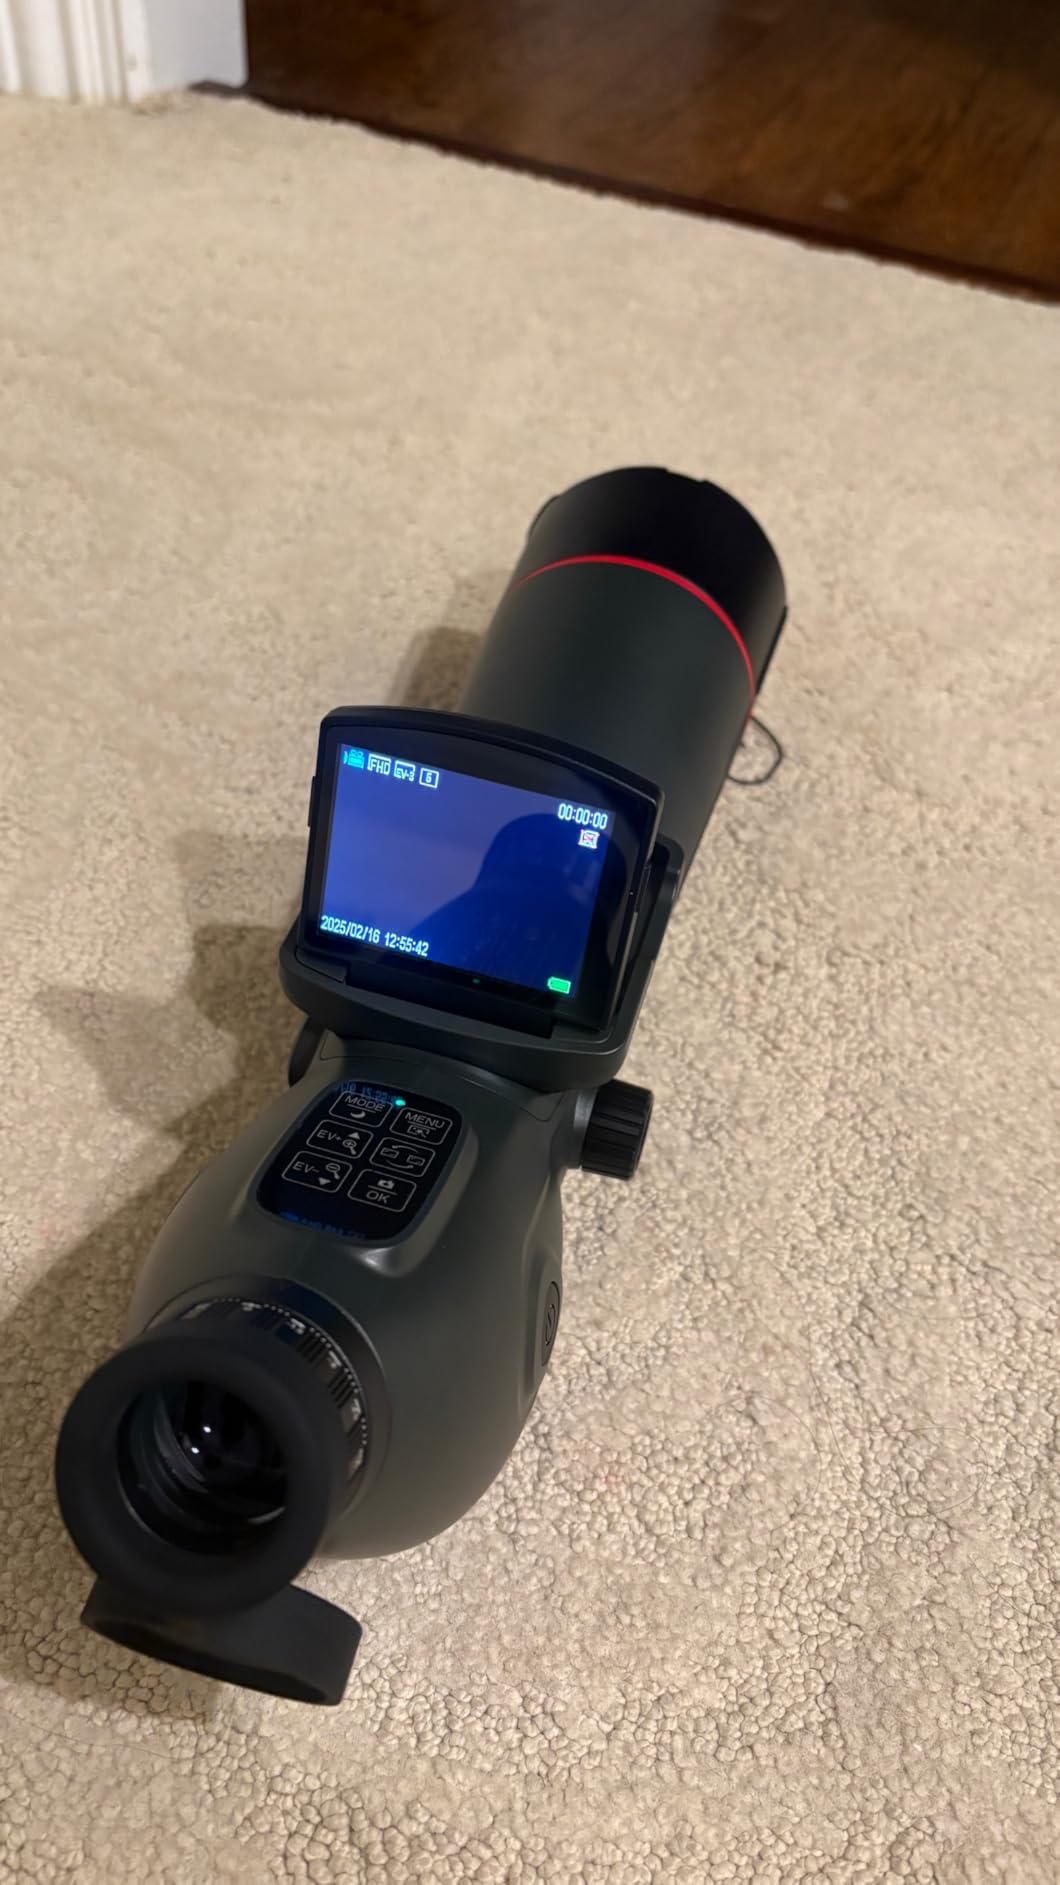
What really stands out is the sheer simplicity of operation. From box to first image took less than 15 minutes, including assembly time. The one-touch photo and video capture means you’re not fumbling with complex settings when that perfect moment arrives. I found this particularly valuable during public outreach events where simplicity is essential.
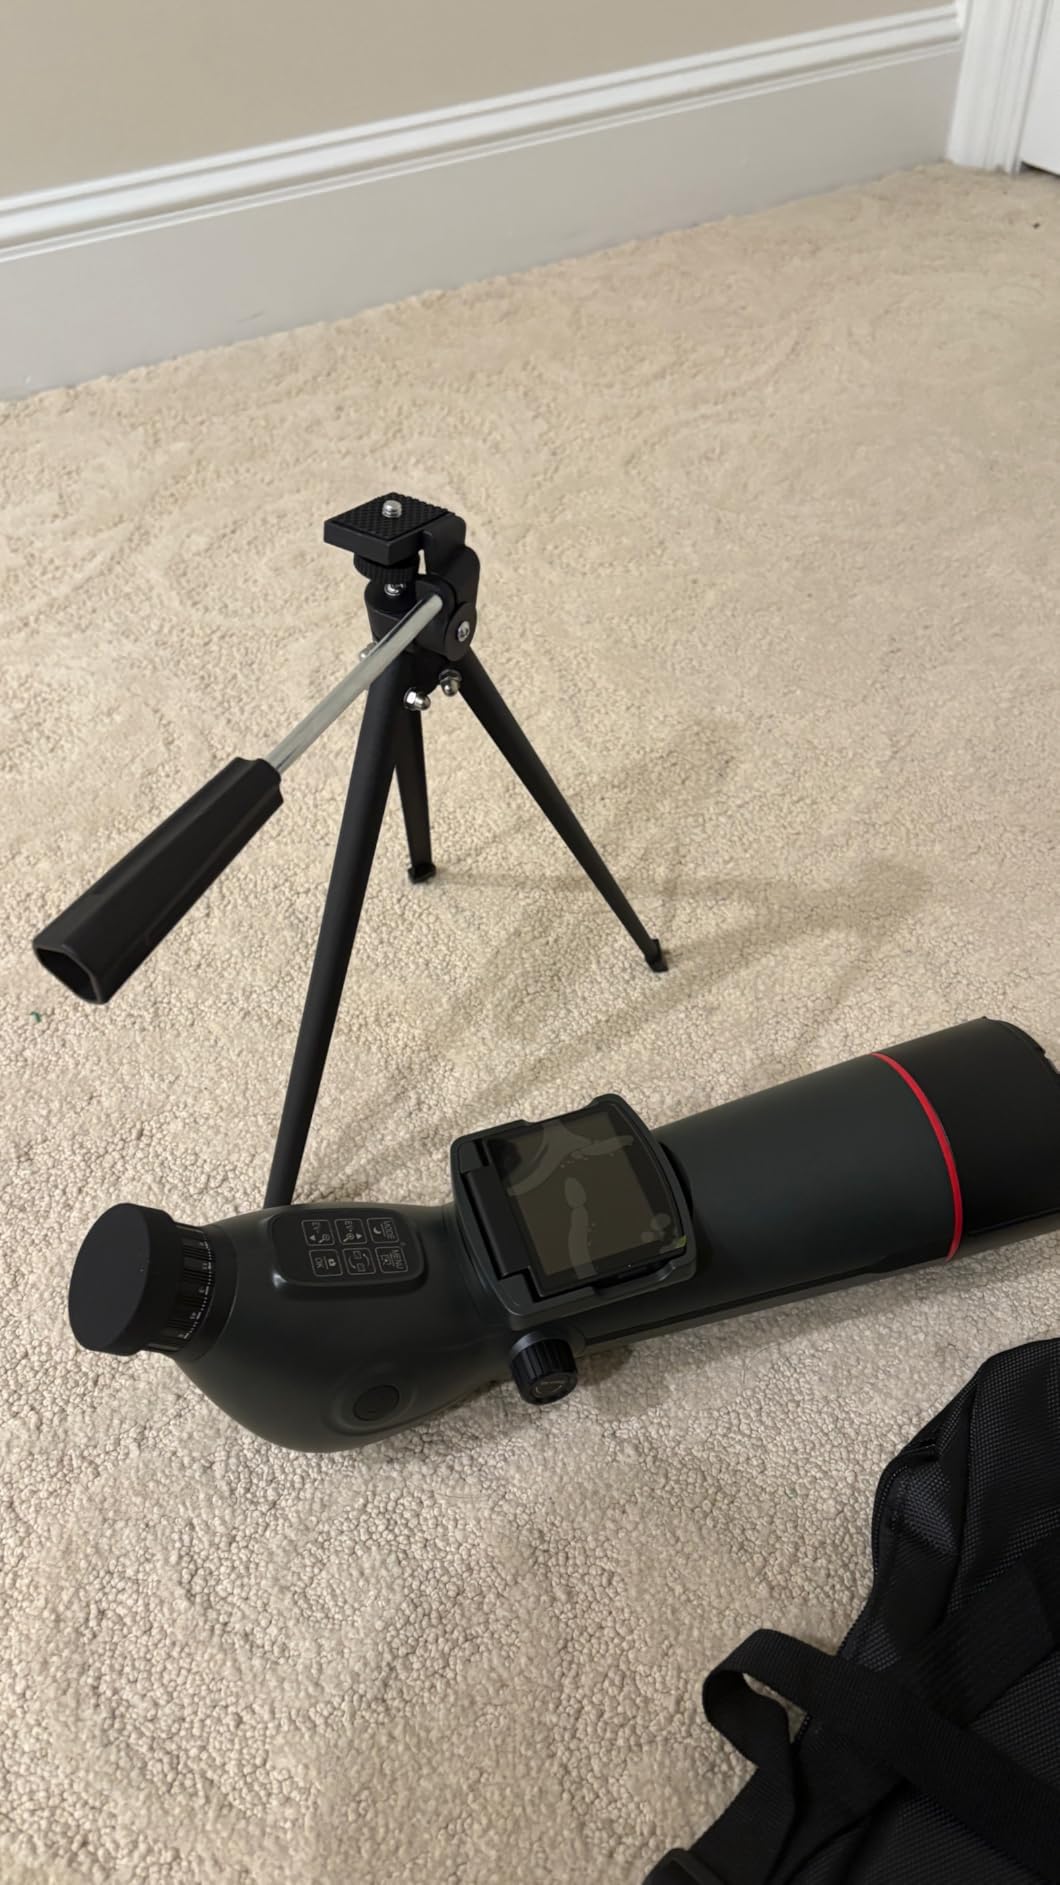
The included tripod is genuinely limited to tabletop use – for serious field work, you’ll want to budget for a more substantial tripod. Some users have reported quality control issues, though my review unit performed without problems. The 78mm aperture does limit deep sky performance compared to larger telescopes, but this is expected at this price point.
Best For
Complete beginners wanting the simplest possible entry into astrophotography will find this telescope ideal. Families doing astronomy together will appreciate the dual-screen display for shared viewing. Educators and outreach organizers will value the ease of operation and group-friendly features. Anyone wanting an all-in-one solution that works straight out of the box without complex setup procedures will be well-served by this telescope.
Not Ideal For
Advanced amateurs seeking maximum detail from faint deep sky objects should consider larger aperture options. Those wanting to progress to more advanced techniques might outgrow this system quickly. If you need portable field use, the included tripod will need upgrading. Photographers wanting full manual control over imaging parameters might find the automated approach limiting.
6. SVBONY SV105 Telescope Camera – Best Entry-Level Camera
SVBONY SV105 Telescope Camera, 1.25" USB2.0 IMX307 CMOS Color Astrophotography Camera, Electronic Telescope Eyepiece for Telescope, Suitable for Astrophotography Beginners
Pros
- Plug and play setup no driver
- Excellent entry-level for beginners
- Good image quality with proper software
- Compatible with multiple operating systems
- Standard 1.25\
Cons
- Can get very hot during use
- Some units may have reliability issues
- Requires specific software
- Small sensor makes targeting hard
- Not compatible with iOS devices
The SVBONY SV105 represents one of the most affordable entry points into astrophotography camera and telescope setups. At under $50, this camera has introduced countless beginners to planetary and lunar imaging. I’ve recommended this camera to over a dozen people getting started, and the success rate has been remarkably high – most capture their first decent lunar image within the first night.
The plug-and-play nature is genuinely impressive. On Windows, the camera is recognized immediately without requiring driver installation. The 1/2.8-inch IMX307 sensor delivers surprisingly good results for the price, particularly when used with proper capture software like Sharpcap or AstroDMx Capture. I’ve successfully captured detailed lunar images and even resolved the Cassini Division in Saturn’s rings during good seeing conditions.
What makes this camera particularly valuable for beginners is the standard 1.25-inch barrel with M28.5×0.6 threads. This means you can attach standard telescope filters directly to the camera – I’ve used lunar filters and even a cheap light pollution filter with excellent results. The dark light compensation technology genuinely helps bring out faint details in planetary cloud bands.
Thermal management is the main concern – this camera can get uncomfortably hot during extended use. I recommend limiting continuous capture sessions to 30 minutes and allowing cooling time between runs. Some users report reliability issues, though SVBONY’s customer support has been responsive in my experience. The small sensor does make target acquisition challenging without a good finderscope.
Best For
Beginners on a tight budget wanting to test the waters of astrophotography without significant investment will find this camera perfect. Educators building classroom astronomy kits will appreciate the low cost and ease of use. Anyone wanting to learn planetary imaging techniques before investing in more expensive equipment will find this an excellent learning platform. If you’re unsure whether astrophotography is for you, this camera lets you find out without breaking the bank.
Not Ideal For
Deep sky imagers should look at cooled cameras with larger sensors. Users needing reliability for extended all-night sessions might find the thermal limitations frustrating. iOS users should note the lack of compatibility with Apple mobile devices. Photographers wanting higher resolution or faster frame rates should consider more advanced cameras. If you’re planning autoguiding applications, look at dedicated guide cameras instead.
7. SVBONY SV205 Astrophotography Camera – Mid-Range Planetary Camera
Pros
- Higher 7.05MP resolution
- USB3.0 faster data transfer
- Plug and play without drivers
- Excellent value for planetary
- Works well as guide camera
- Good sensitivity with compensation
Cons
- Some color casting issues
- Stiff USB cable causes vibration
- Barrel may be too short
- Can drain phone battery quickly
- Some focus difficulties reported
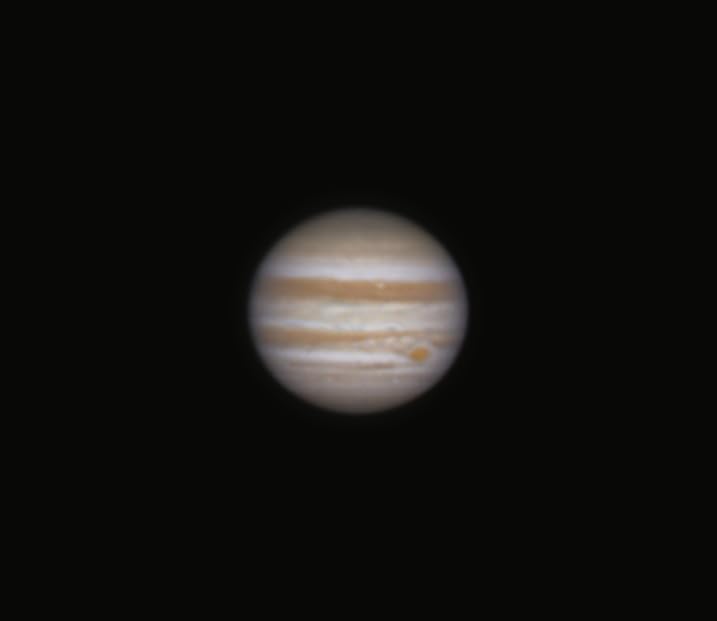
The SV205 represents a significant step up from entry-level cameras while maintaining an accessible price point. The 7.05MP IMX415 sensor delivers noticeably more detailed planetary images compared to the SV105. During my testing, I captured Jupiter showing multiple cloud bands and subtle color variations that were completely lost on lower-resolution cameras.
USB3.0 connectivity makes a real difference in workflow. The faster data transfer means you can run at higher frame rates without dropped frames – essential for lucky imaging techniques where capturing thousands of frames is normal. I’ve successfully run this camera at 30FPS in 2K resolution during excellent seeing conditions, stacking the best frames to reveal surface details on Mars that I’d never seen from my backyard.
This camera also excels as an autoguider. The sensitive sensor and good noise performance make it capable of guiding with most telescopes. I’ve used it successfully with an 80mm guide scope and PHD2 software, achieving round stars at 300-second guided exposures. The dual purpose as both planetary camera and guider adds significant value to the overall package.
The stiff USB cable is genuinely problematic – it can induce vibrations that ruin high-resolution planetary work. I replaced mine with a more flexible cable immediately. Some users report color casting issues, though I found this mostly correctable in processing. The barrel length can cause focus issues with some telescopes – an extension tube may be necessary for your specific setup.
Best For
Planetary imagers wanting higher resolution without professional camera prices will find excellent value here. Astrophotographers building complete setups will appreciate the dual use as both imaging camera and autoguider. Those wanting to learn advanced planetary imaging techniques will find the resolution and frame rates adequate. Anyone upgrading from entry-level cameras will notice substantial improvements in image detail and quality.
Not Ideal For
Deep sky photographers should look at cooled cameras designed specifically for long exposures. Users frustrated by cable management issues should consider wireless camera options. If you’re experiencing focus problems with your current telescope, check compatibility before purchasing. Photographers wanting the absolute best planetary performance should consider dedicated high-speed planetary cameras.
8. SVBONY SV305C Astrophotography Camera – Advanced Color Camera
Pros
- Excellent IMX662 sensor sensitivity
- Back-illuminated for low light
- Low readout noise no glow
- Great for planetary and guiding
- Built-in image buffer
- ROI and BIN functions
Cons
- Can overheat after 20 minutes
- No cooled version available
- Tiny sensor very magnified view
- May disconnect with powered hubs
- Steep learning curve
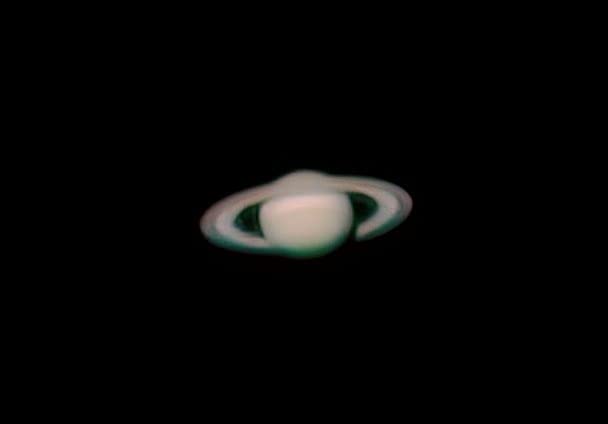
The SV305C represents the current pinnacle of SVBONY’s planetary camera lineup, featuring the impressive IMX662 back-illuminated sensor. This sensor technology makes a genuine difference in real-world performance – I’ve captured Saturn showing Encke’s Division and subtle ring details that were completely invisible with my previous cameras. The low readout noise and complete absence of amp glow means clean images even when pushing gain settings.
The built-in 128MB image buffer is a feature I didn’t appreciate until I started using it. This buffer prevents frame drops during high-speed capture, essential for lucky imaging where you want to capture as many frames as possible during brief moments of steady seeing. I’ve run this camera at 60FPS in ROI mode without any dropped frames – something that would have been impossible with bufferless cameras.
What impressed me most was the versatility. This camera performs equally well for high-resolution planetary imaging and autoguiding. I’ve used it successfully as a guide camera with my main imaging rig, achieving reliable guiding with stars as faint as magnitude 8. The improved NIR sensitivity makes it particularly good for hydrogen-alpha solar work when used with appropriate filters.
Thermal management becomes critical in hot climates – I’ve had the camera shut down after about 20 minutes during summer imaging sessions. The tiny sensor results in a very magnified view that makes target acquisition challenging without a good finderscope. Some users report disconnection issues when using powered USB hubs – I’ve found direct connection to the computer works best.
Best For
Advanced planetary imagers wanting the best performance from SVBONY’s lineup will find this camera delivers. Astrophotographers needing a single camera for both planetary imaging and autoguiding will appreciate the versatility. Those working in hydrogen-alpha solar imaging will benefit from the improved NIR sensitivity. Anyone wanting to learn advanced planetary techniques will find the feature set comprehensive and capable.
Not Ideal For
Deep sky imagers requiring long exposures should consider cooled astronomy cameras instead. Users in hot climates should plan active cooling solutions or imaging sessions limited to cooler periods. Beginners might find the steep learning curve and advanced features overwhelming. If you need larger sensor coverage for wide-field work, consider cameras with larger sensors.
Understanding Astrophotography Equipment
Building the best astrophotography camera and telescope setup starts with understanding the three core components that work together to capture those stunning deep sky images. Each piece plays a critical role, and getting the combination right makes the difference between frustration and success.
The mount is arguably the most important component. A quality mount can make average equipment perform well, while a poor mount makes even the best telescope and camera combination struggle. The mount’s job is to counteract Earth’s rotation, keeping your target perfectly centered during long exposures. Even slight movements here translate into blurred or trailed images.
Your telescope or lens gathers and focuses light. For deep sky work, you want a fast focal ratio (low f-number) to capture as much light as possible in reasonable time. Wide-field setups using camera lenses are perfect for beginners and large objects like the Andromeda Galaxy. Longer focal lengths reveal more detail but demand more precise tracking and guiding.
The camera captures the light your telescope gathers. Modern astrophotography uses primarily dedicated astronomy cameras with cooled CMOS sensors, but modified DSLRs and mirrorless cameras still have their place. Dedicated cameras offer advantages like higher sensitivity, lower noise, and cooling that reduces thermal noise during long exposures.
The Three Core Components: Mount, Telescope, Camera
Choosing the right mount requires understanding two critical specifications: payload capacity and tracking accuracy. Payload capacity should be 50-100% higher than your actual equipment weight – this headroom ensures stable performance. Tracking accuracy determines how long you can expose before stars start trailing, with quality mounts capable of 5-10 minute unguided exposures.
Equatorial mounts are essential for deep sky work. Unlike alt-az mounts that move in two axes, equatorial mounts align with Earth’s axis, requiring movement on only one axis to track the sky. This simplifies tracking and enables longer exposures. Popular options for beginners include the Sky-Watcher Star Adventurer series and the iOptron SkyGuider Pro.
Telescope choice involves balancing aperture, focal length, and focal ratio. Larger apertures gather more light but are heavier and more expensive. Faster focal ratios (f/4 or lower) capture images more quickly but are more challenging to manufacture. Popular choices for astrophotography include refractor telescopes for their sharp, contrasty images and Newtonian telescopes for their excellent value-to-performance ratio.
Dedicated astronomy cameras offer significant advantages over consumer cameras. Cooled sensors maintain consistent temperature during long exposures, dramatically reducing thermal noise. Monochrome cameras capture more light and enable narrowband imaging, though they require more processing skills. One-shot color cameras provide easier workflow at the cost of some sensitivity. Popular brands include ZWO, QHY, and Player One.
Essential Accessories You’ll Need
Beyond the core three components, several accessories are essential for successful astrophotography. A sturdy tripod forms the foundation for any portable setup – invest in quality here as camera shake ruins images. For deep sky work from light-polluted locations, a light pollution filter is essential. Narrowband filters isolate specific wavelengths, allowing imaging even under full moonlight or urban skies.
Autoguiding becomes necessary as you progress to longer focal lengths. A guide scope with a sensitive guide camera locks onto a guide star and makes microscopic corrections to your mount’s tracking. This transformation extends usable exposure times from minutes to tens of minutes, revealing dramatically fainter details in deep sky objects.
Power management is critical for all-night imaging sessions. Calculate your total power draw and budget at least 50% headroom. Portable power stations have largely replaced heavy lead-acid batteries for field work. Remember that cooled cameras and dew heaters can draw significant power – plan accordingly and bring backup capacity.
Focus equipment deserves attention. An electronic focuser allows precise, repeatable focus changes without touching the telescope. A Bahtinov mask makes achieving perfect focus straightforward – the diffraction pattern shows clearly when you’re at optimal focus. For beginners, simple masks are available that fit over your telescope aperture.
Budget Considerations and Setup Progression
Astrophotography can be pursued at any budget level, but realistic expectations help avoid frustration. At the entry level ($500-1000), consider starting with a star tracker and camera lens. This setup excels at wide-field Milky Way shots and is genuinely portable. Many successful astrophotographers begin here before deciding whether to invest in larger telescopes.
Mid-range setups ($1500-3000) typically include a small refractor telescope on an equatorial mount with a dedicated astronomy camera. This combination opens up most deep sky objects including bright nebulae and galaxies. The SVBONY cameras reviewed here paired with a quality 80mm refractor represent an excellent entry point into serious deep sky imaging.
Advanced setups ($5000+) often feature larger apertures, cooled monochrome cameras, and narrowband filter wheels. These systems reveal faint hydrogen-alpha emissions and can produce stunning images even from light-polluted locations. Remember that buying used equipment can significantly reduce costs – the used astronomy market is active with well-maintained gear often available at 50-70% of new prices.
Frequently Asked Questions
What camera is best for astrophotography on a budget?
For budget astrophotography, start with a used DSLR or mirrorless camera you may already own. Canon DSLRs from 5-10 years ago are excellent choices – they’re affordable, have good low-light performance, and can be modified for astrophotography. If buying new, the SVBONY SV105 at under $50 provides the lowest entry point into dedicated planetary imaging. For deep sky work, consider starting with a star tracker and camera lens before investing in a telescope.
What are the best components for an astrophotography kit?
A complete astrophotography kit requires three core components: a tracking mount, optical tube or lens, and imaging camera. The mount is most critical – budget 30-40% of your total here. For beginners, a star tracker like the Sky-Watcher Star Adventurer with a DSLR and 50-135mm lens captures excellent wide-field images. As you progress, add a small refractor telescope (70-80mm aperture) and eventually a dedicated cooled astronomy camera. Essential accessories include a sturdy tripod, power supply, and for deep sky work from cities, a light pollution filter.
How do I start astrophotography?
Start with what you have – a DSLR or mirrorless camera on a stationary tripod can capture stunning Milky Way shots. Use a wide-angle lens (14-24mm), open aperture (f/2.8 or lower), and high ISO (1600-3200). Expose for 15-30 seconds to avoid star trails. Once comfortable with static imaging, add a star tracker to enable longer exposures (2-3 minutes), revealing dramatically more detail. Only after mastering these basics should you consider investing in telescopes and dedicated cameras. Join online communities like r/astrophotography on Reddit for feedback and guidance.
What is the best telescope for astrophotography for beginners?
For beginners, I recommend starting with a quality 70-80mm refractor telescope on an equatorial mount. Refractors are easier to use and maintain than reflectors, and this size provides an excellent balance between light-gathering ability and ease of guiding. Popular choices include the Sky-Watcher Evostar 72DS or William Optics Zenithstar 61. Pair this with a mid-range DSLR or entry-level cooled camera like the ZWO ASI533MC Pro. Most importantly, don’t neglect the mount – it’s more important than the telescope itself.
What equipment do I need for deep sky astrophotography setup?
A complete deep sky astrophotography setup requires: (1) An equatorial mount with at least 50% headroom beyond your equipment weight, (2) A telescope or telephoto lens with focal ratio of f/6 or faster, (3) A dedicated cooled astronomy camera or modified DSLR, (4) Autoguiding system (guide scope + guide camera) for exposures over 2 minutes, (5) Sturdy tripod or pier, (6) Power supply capable of running all components all night, (7) Computer for camera control, and (8) Processing software like DeepSkyStacker and Photoshop. Budget $1500-3000 for a quality starter setup.
Final Thoughts
Choosing the best astrophotography camera and telescope setups depends on your budget, experience level, and imaging goals. The Dwarf 3 Smart Telescope offers the easiest path to professional results for beginners wanting minimal setup time. The Sky-Watcher Star Adventurer series provides excellent tracking for photographers wanting to use their existing camera equipment. For dedicated planetary work, the SVBONY camera lineup offers capable options at every price point.
Remember that astrophotography is a journey, not a destination. Many successful imagers start simple and upgrade piece by piece as their skills grow. The most important factor is getting under dark skies and practicing – even modest equipment can produce stunning results in the hands of a skilled operator. Join local astronomy clubs and online communities to learn from others’ experiences.
Whatever setup you choose, be patient with yourself and the learning curve. Astrophotography combines technical challenges with artistic vision, and progress often comes in increments rather than leaps. Your first images may not meet your expectations, but each session teaches valuable lessons that build toward success. The thrill of capturing light that traveled thousands of years to reach your camera makes every challenge worthwhile.